AWC608 Laser Controller
AWC608 Laser Controller Description
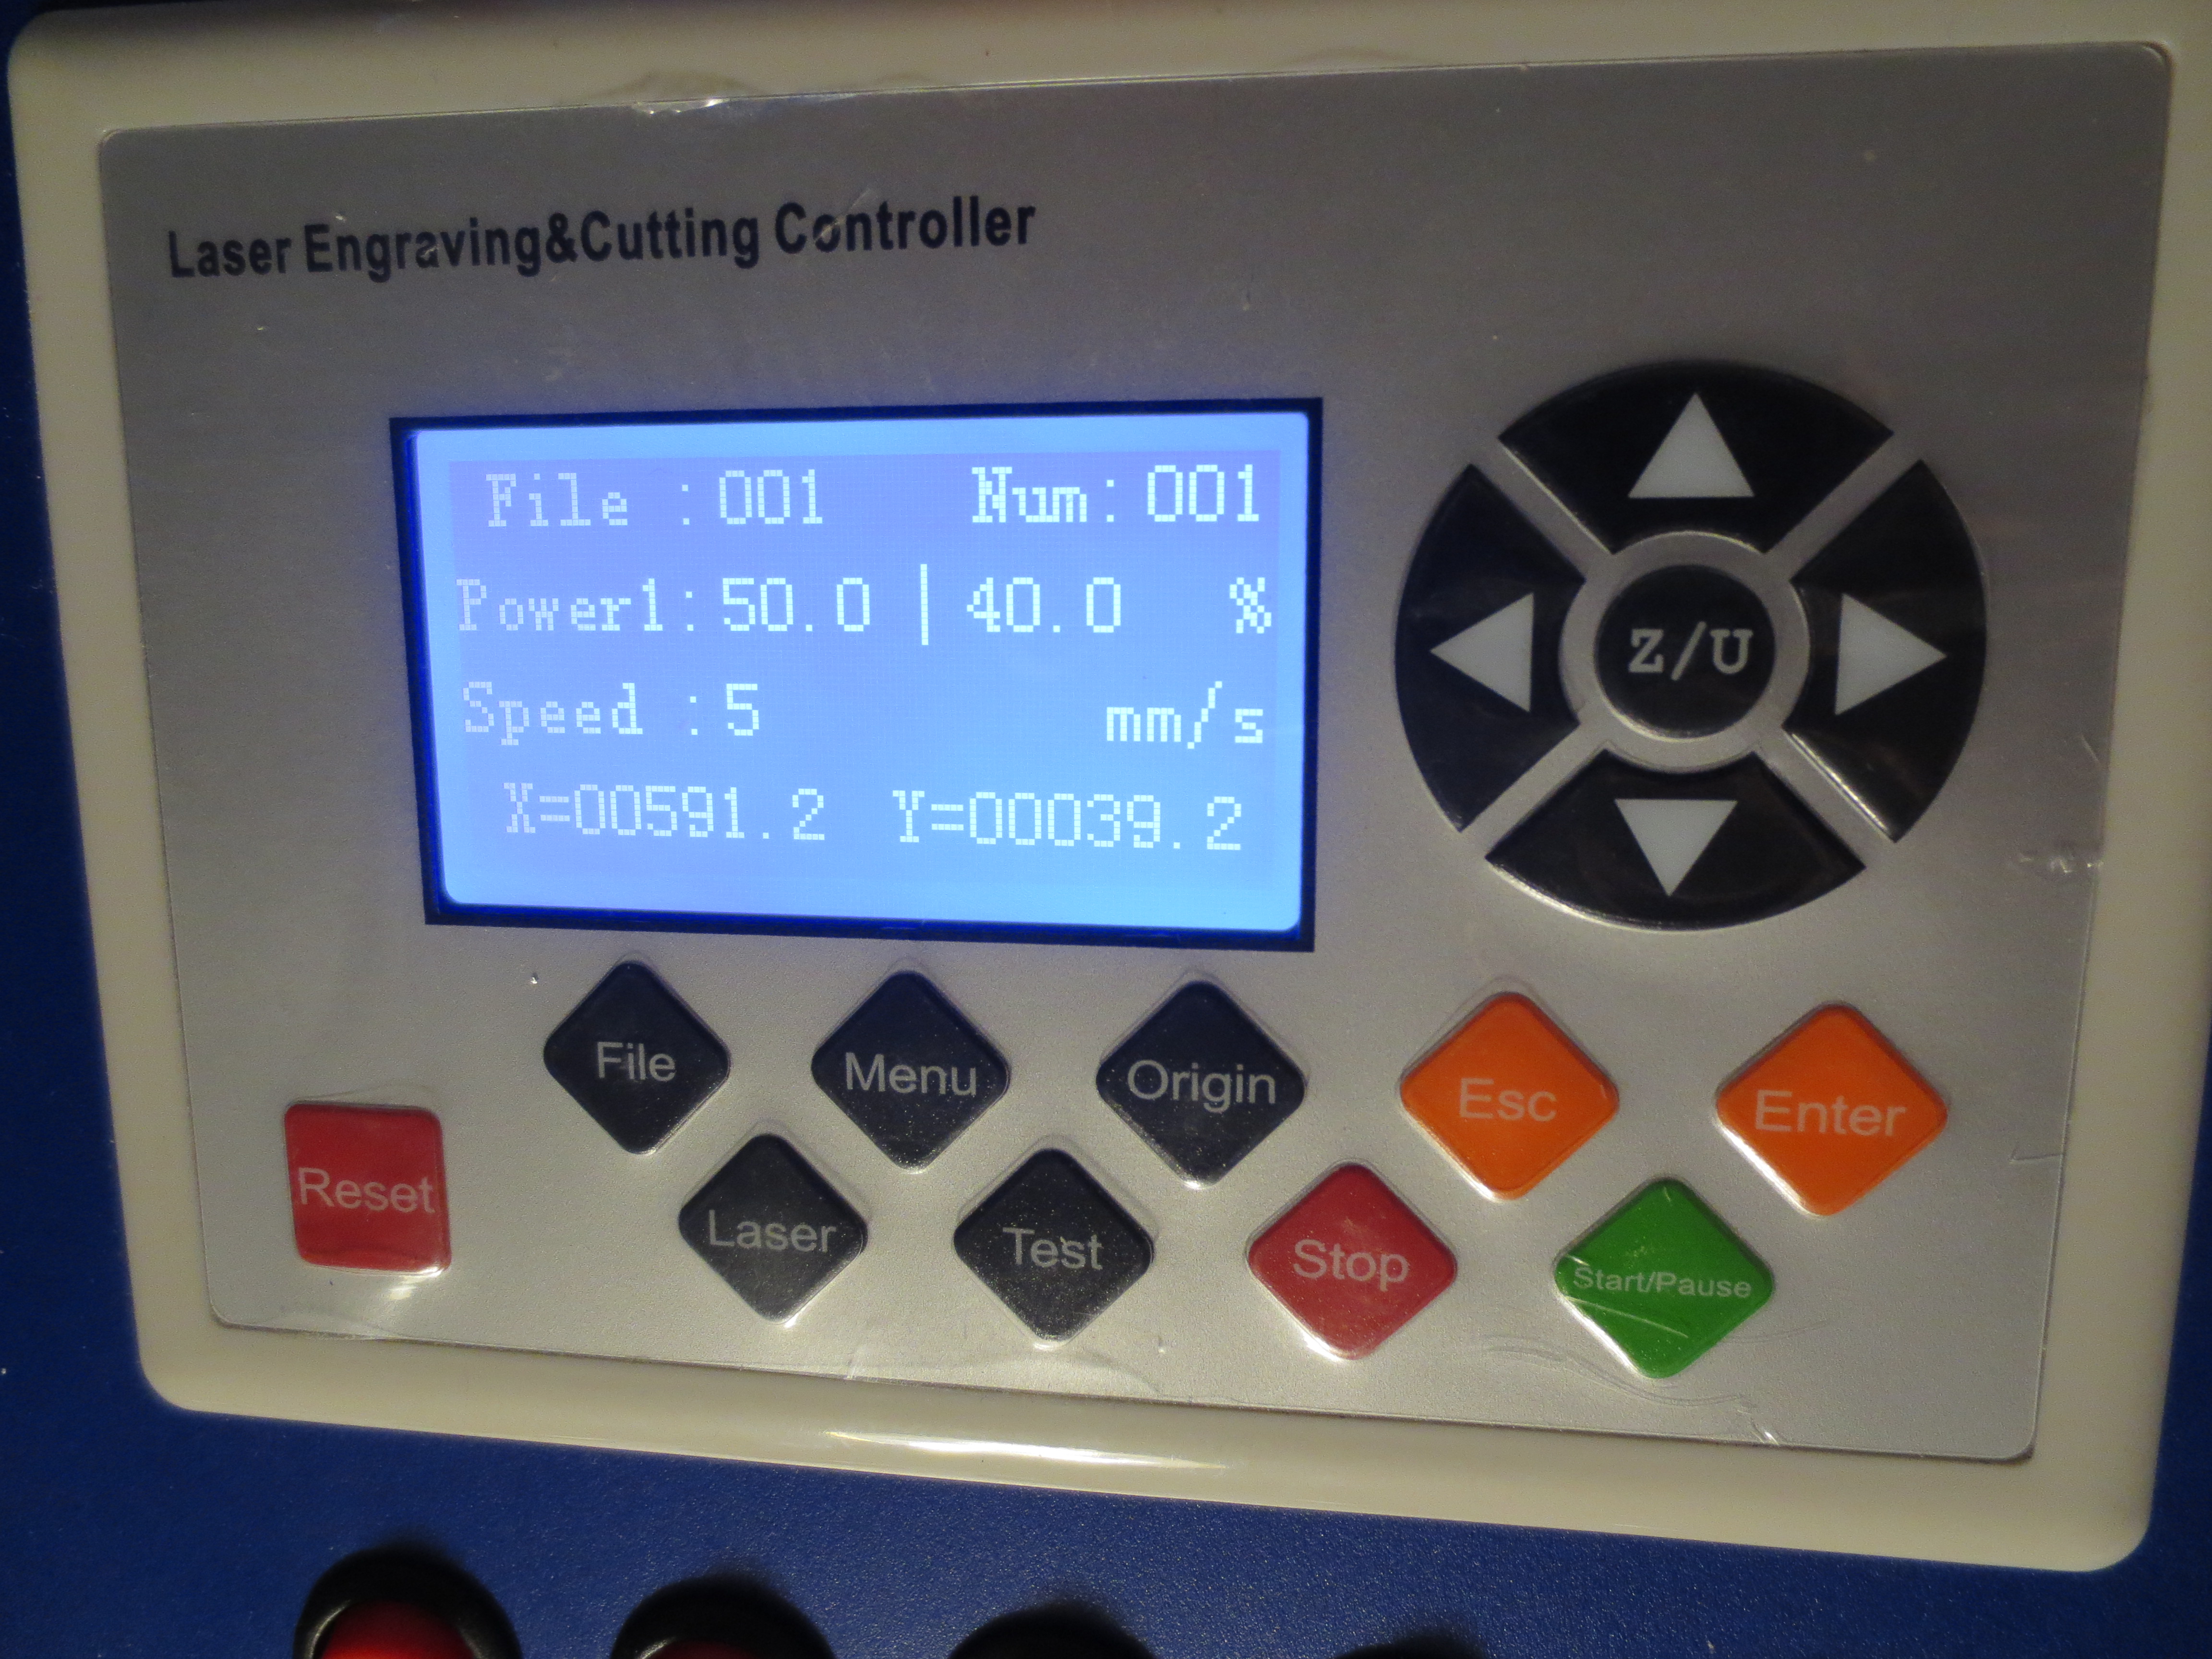
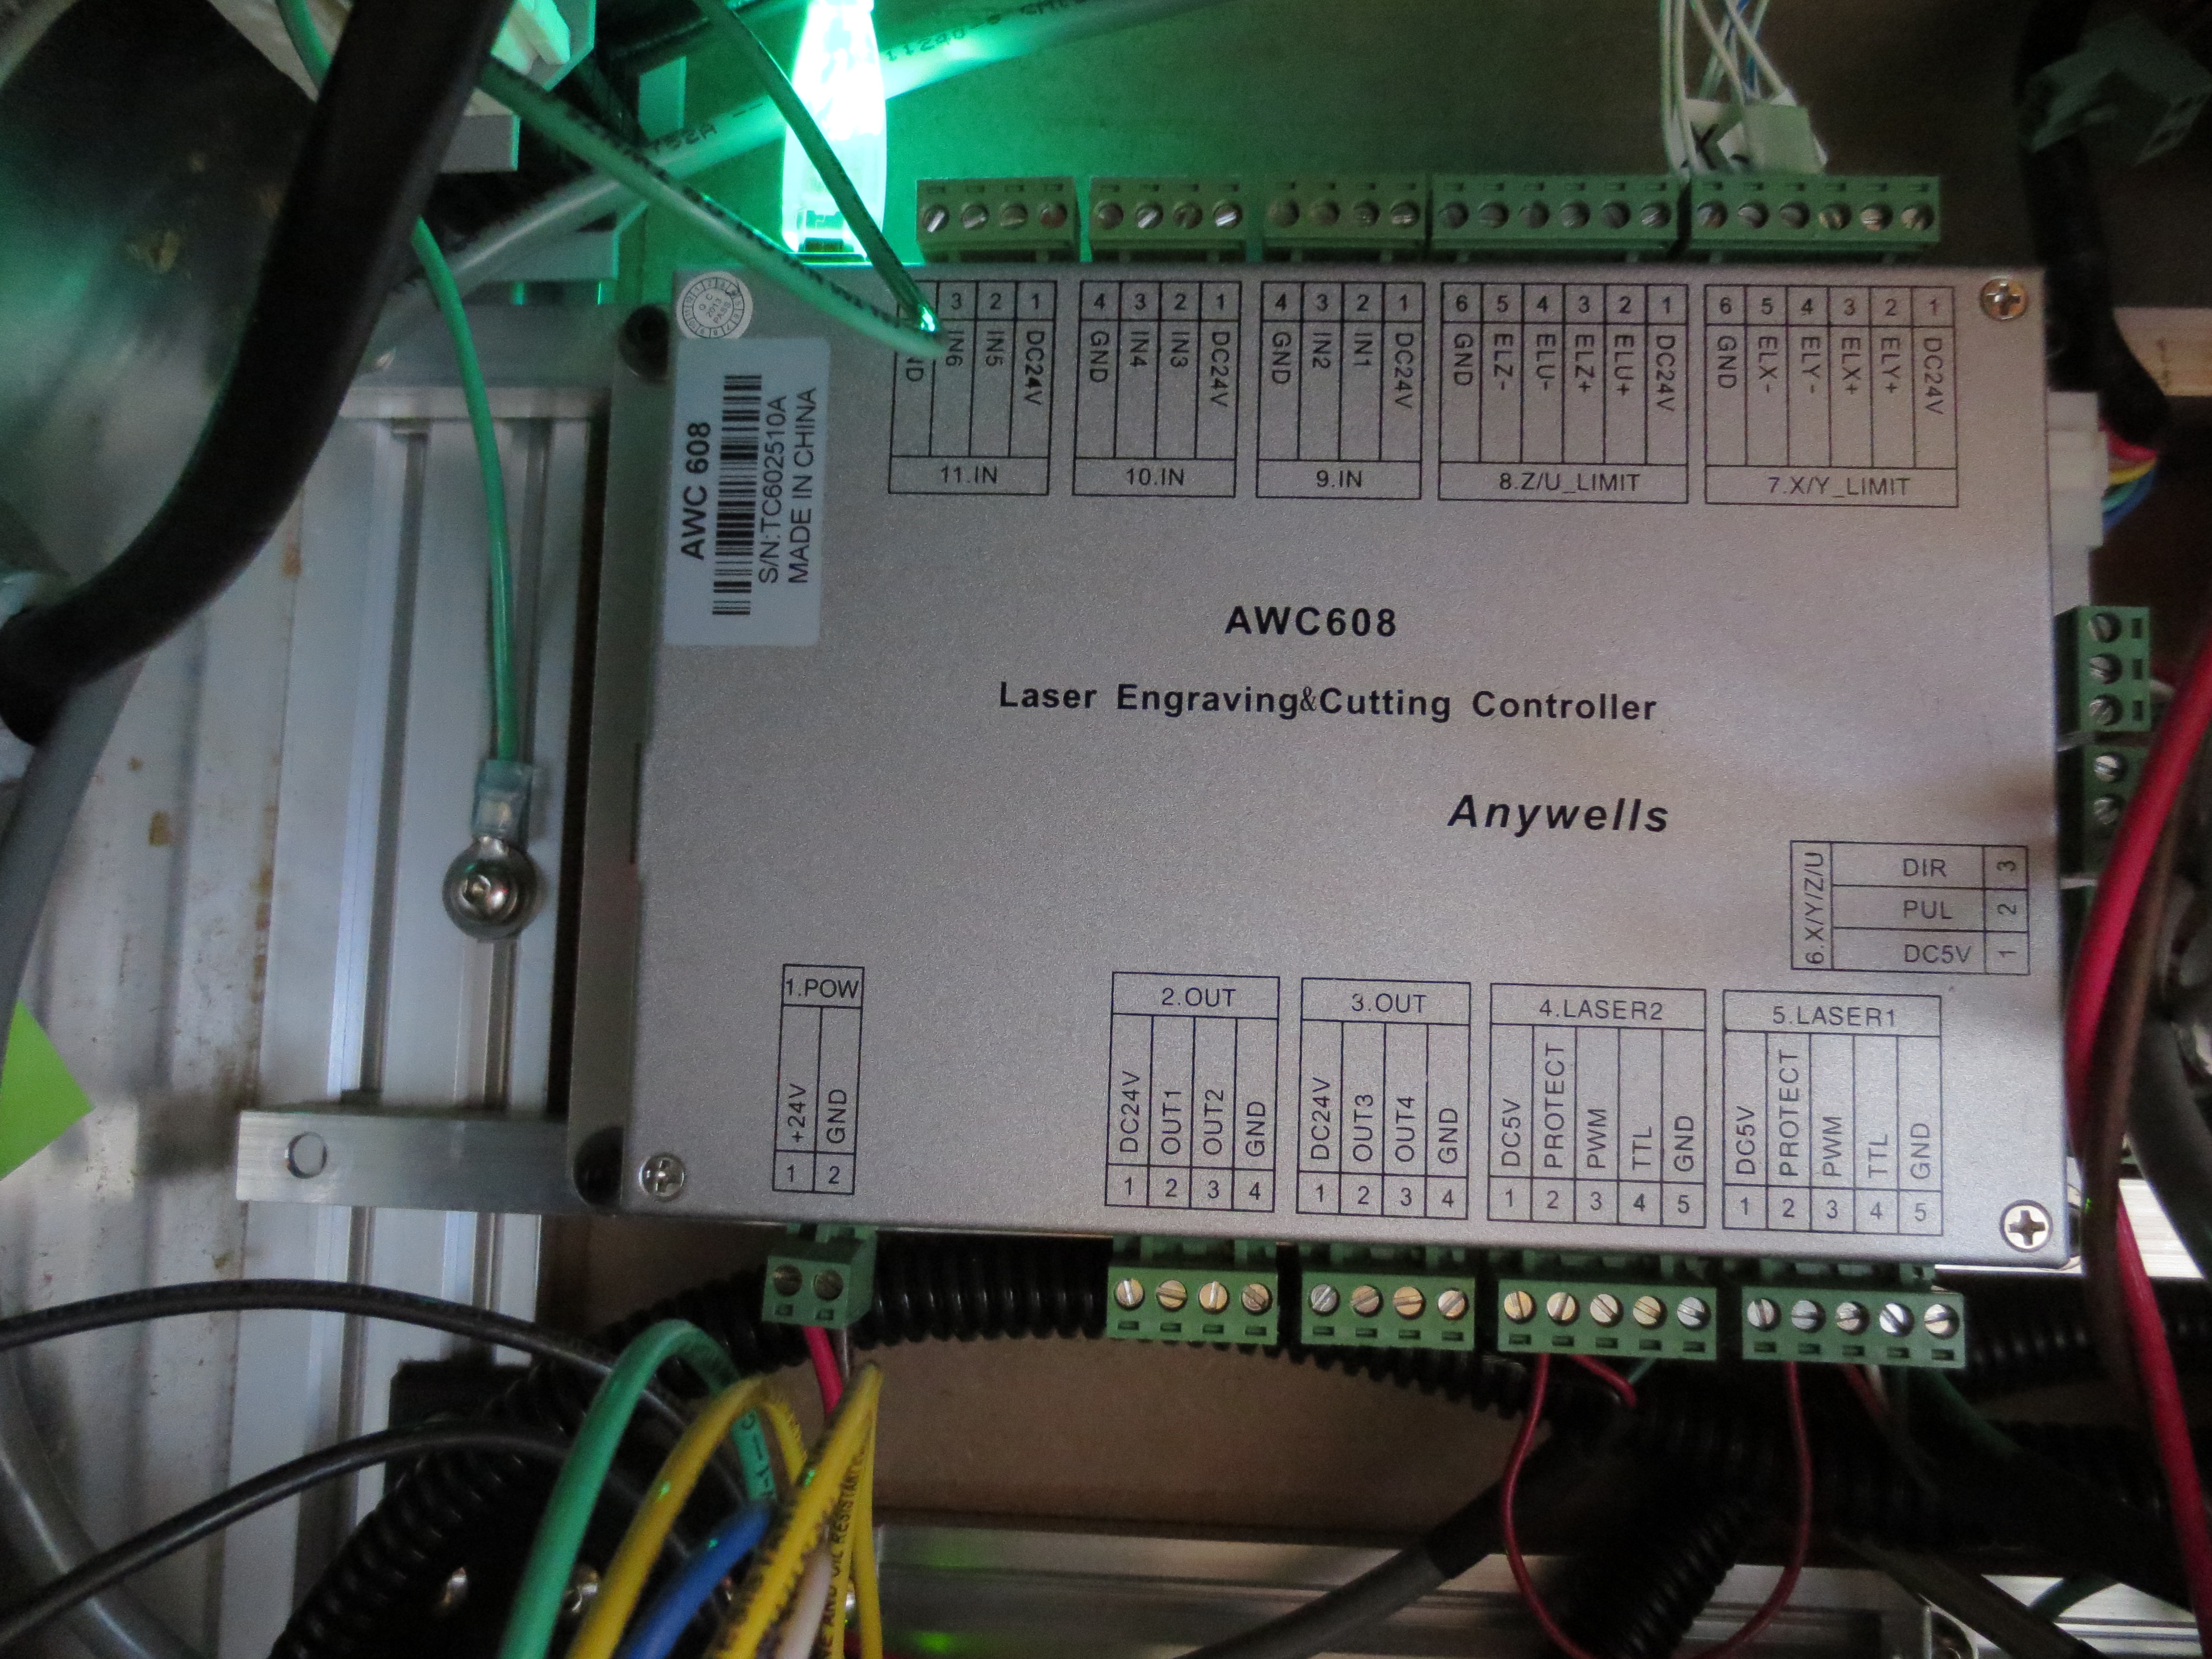
The AWC608 Laser Controller provides a 4-Axis (X, Y, Z, and U-Axis), two laser controls limit switches, water protection and door lockouts. The AWC608 2012 version requires a 24vdc power source and can be controlled by computer via Ethernet or USB or locally via the control head shown above on the left.
I included links to the manuals provided with the controller. (Not a whole lot of detailed electrical specifications listed; just good enough to get by.)
The password to change the factory settings on my unit is “608” yours may be different depending on where you purchased the unit.
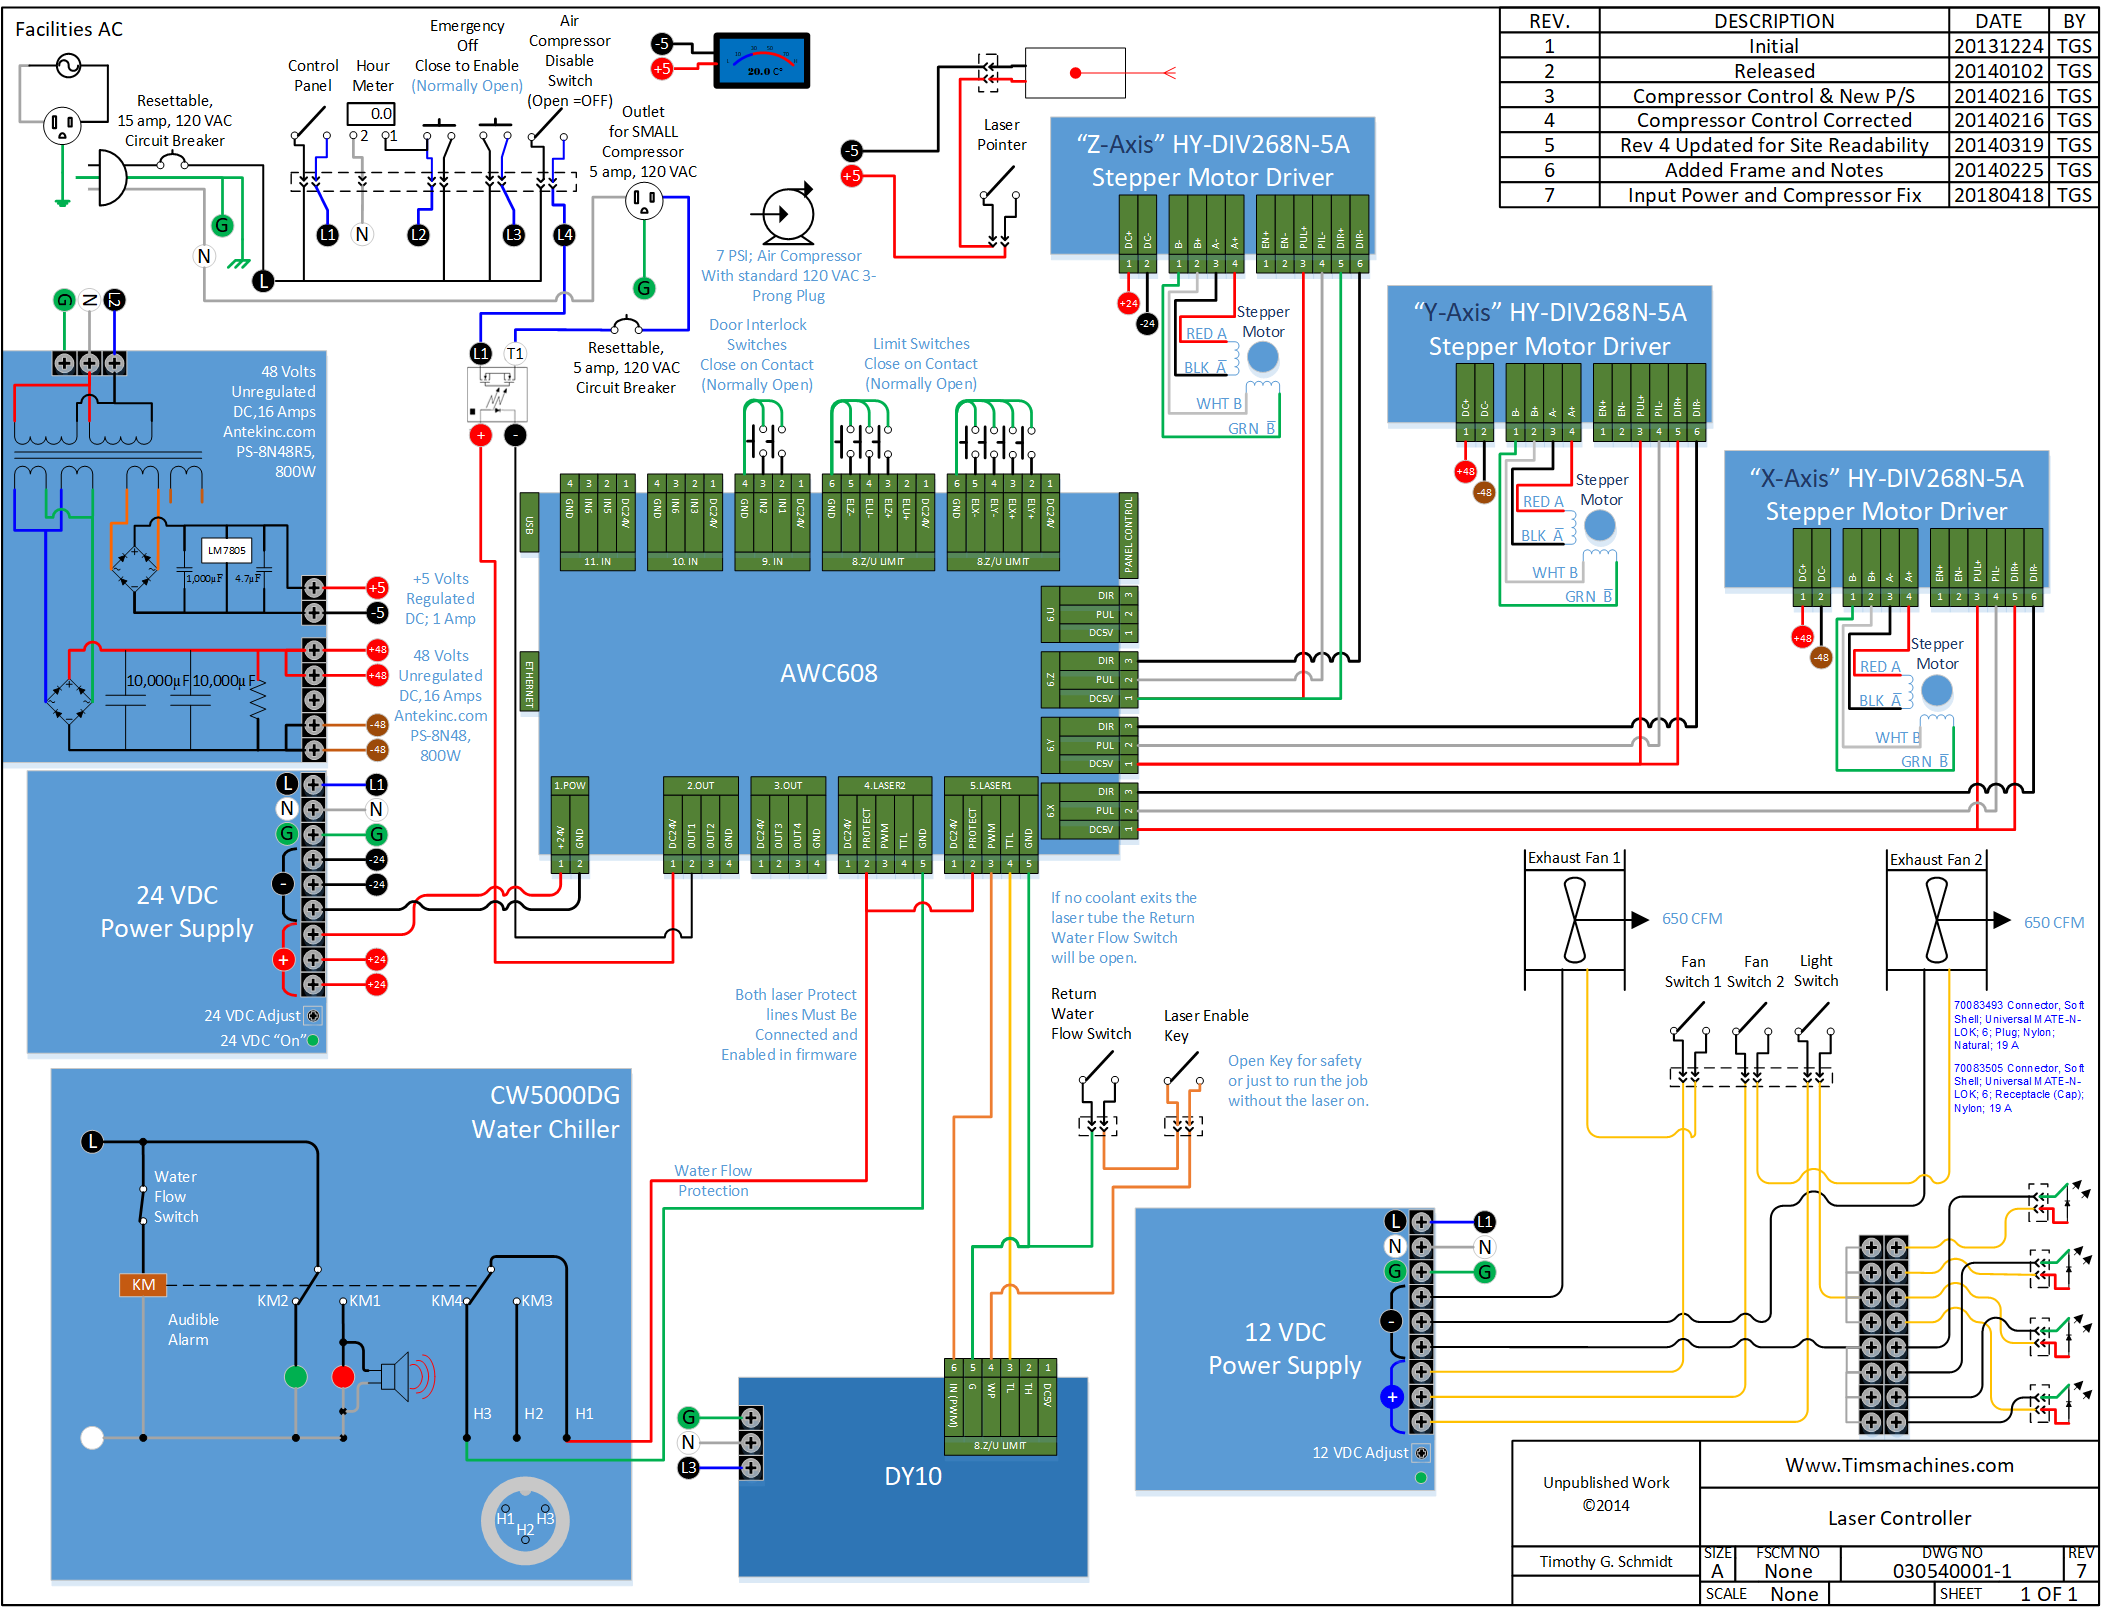
Schematic For an AWC608 Laser Controller using HY-DIV268N-5A (TB6600) Stepper Drivers
The following schematic for a laser cutter uses an AWC608 Laser Controller, 3 HY-DIV268N-5A Stepper Motor Drivers and a 48 Volt, 16A Power Supply from www.antekinc.com PS-8N48R5. The power supply has more than enough current to drive all of the stepper motors as well as 5 VDC, 1 Amp power supply to drive a laser pointer and digital temperature gauge from www.lightobject.com.
To drive the motors I chose the CNC Single Axis TB6600 0.2 – 5A Two Phase Hybrid Stepper Motor Drivers from EBay. (They are the same as the HY-DIV268N-5A two-phase stepper motor drivers). When considering the quantity I chose one per axis (X and Y plus future U and Z). I negotiated a $108 for a total of 4 drivers; delivered to my home. At 5-6 times more expensive you can purchase gecko drives at www.geckodrives.com (they are the best in my opinion; I own 4 G203s and 1 G320) but I did not think that I needed them for what I was doing with this laser at this time.
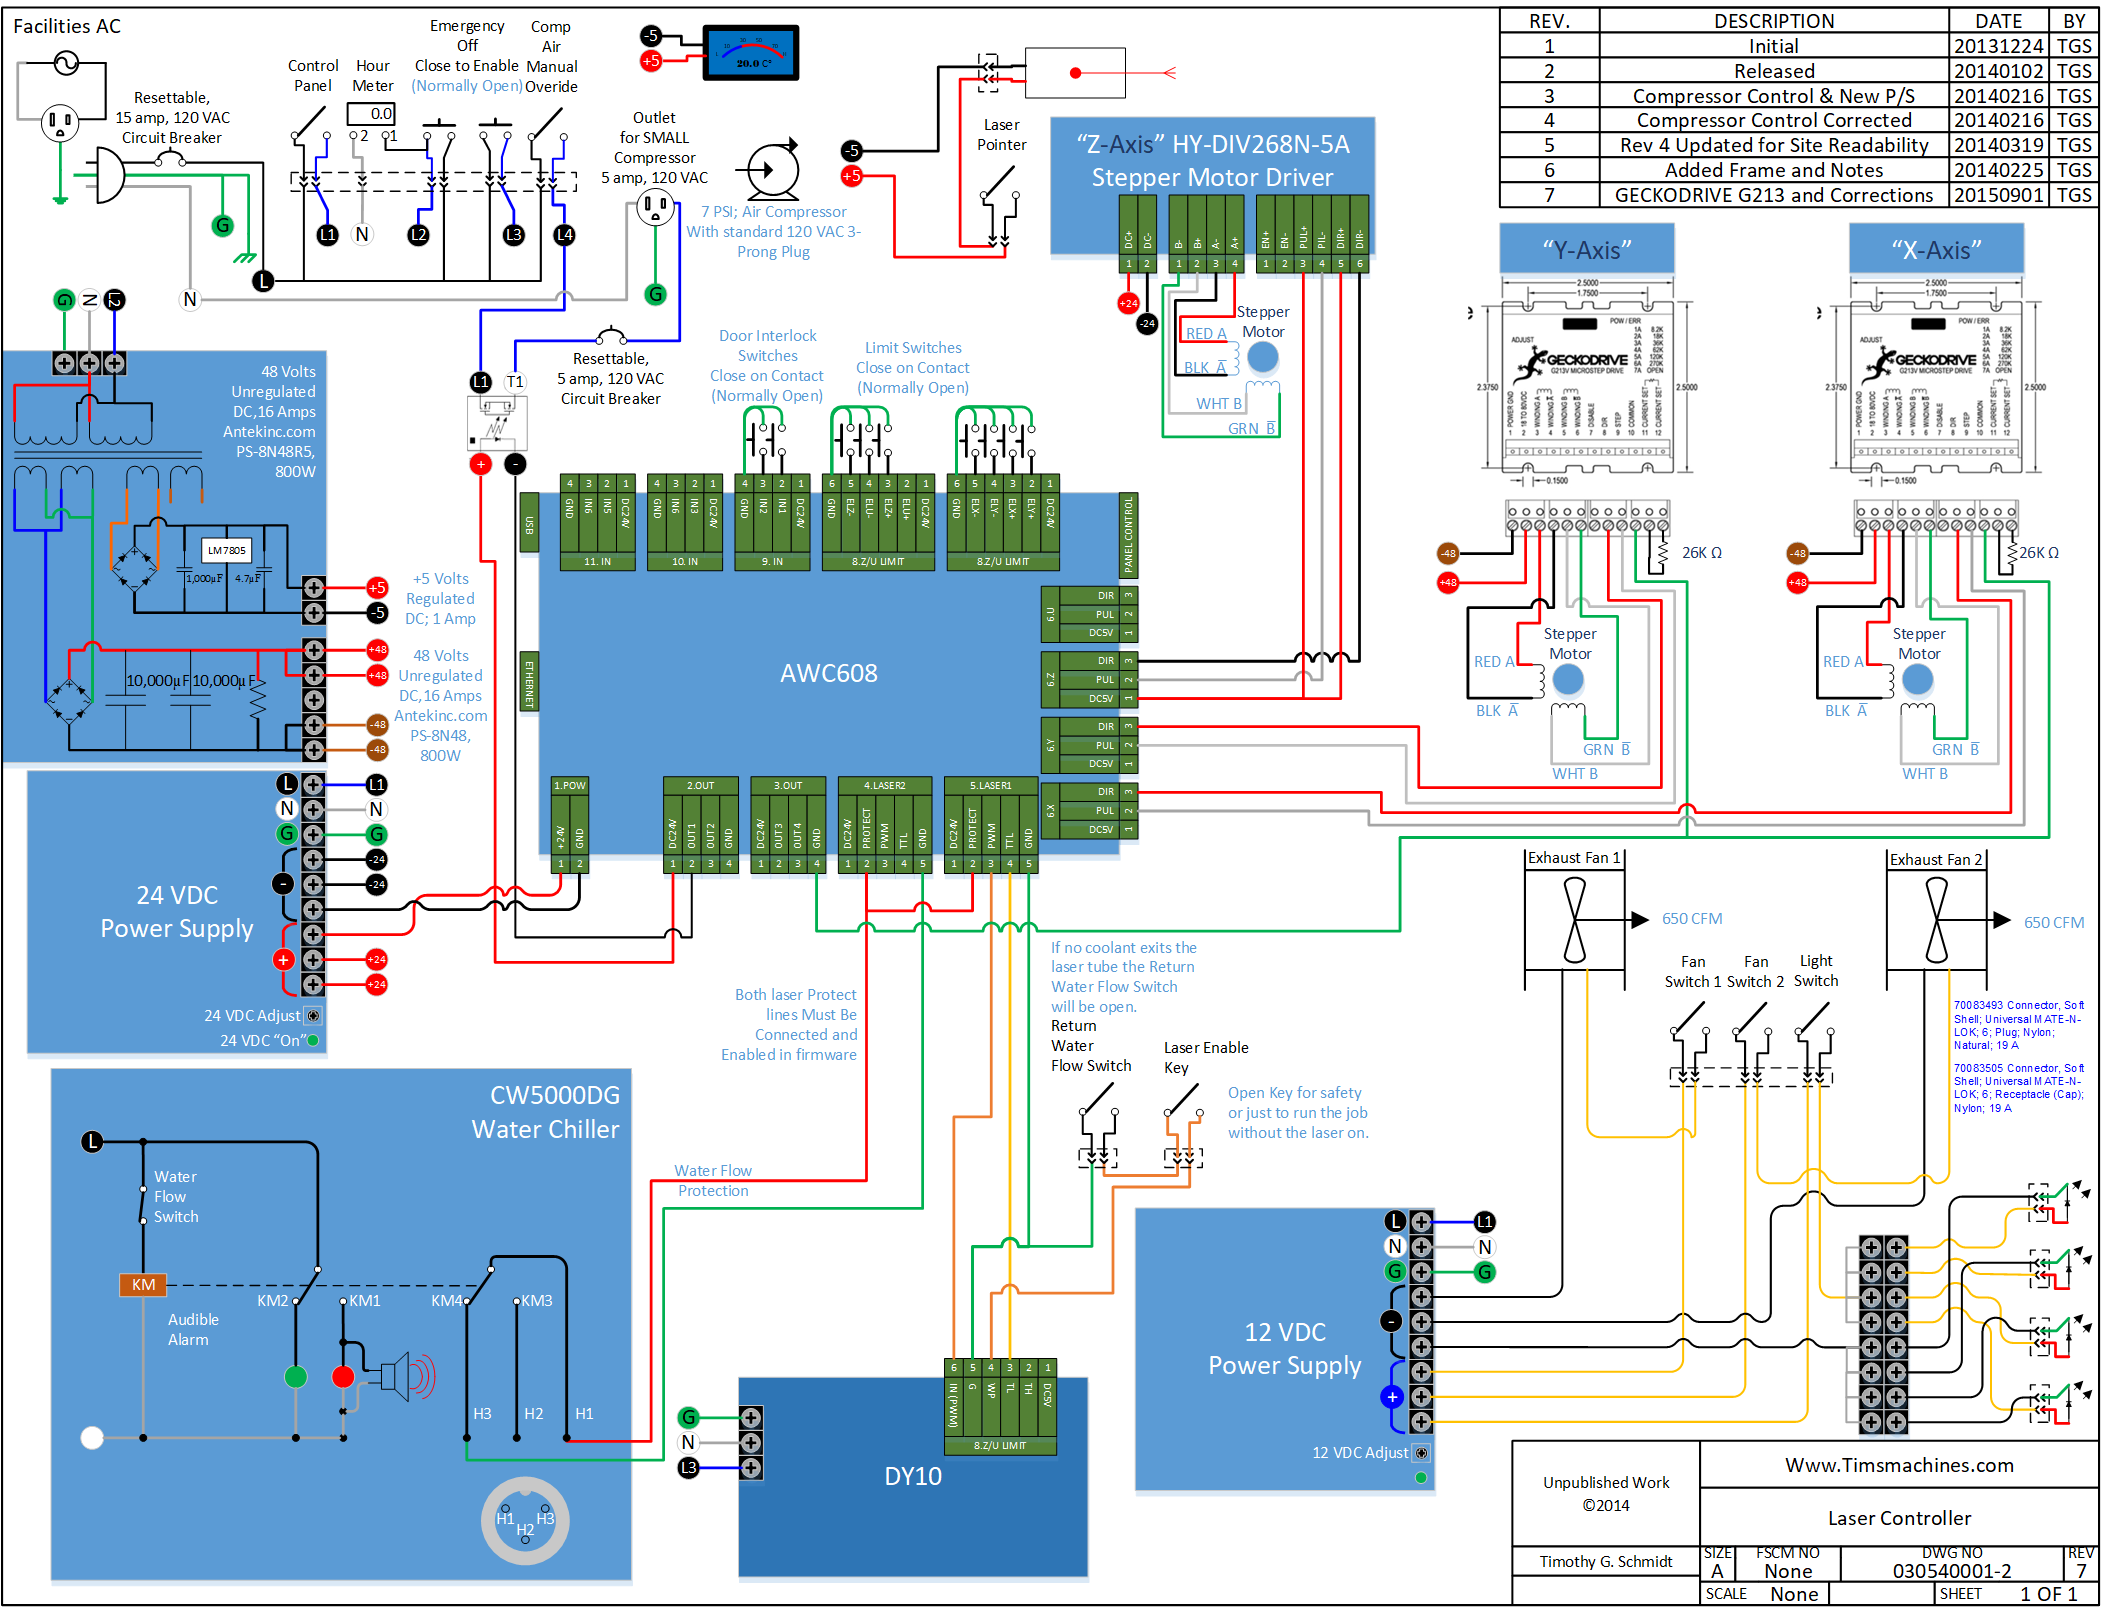
Schematic For AWC608 Laser Controller Using Gecko G213V Drives (X-Y) and HY-DIV268N-5A (Z)
9/1/2015
After speeding up the laser motion and working with smaller more precise movements I decided to update the X and Y Axis stepper Motor Drivers to Gecko model G213V. The stepper motors are now singing when they move. They are pricey but well work their bullet proof reputation and ease of use.
AWC708C Plus Laser Engraver & Cutting Controller
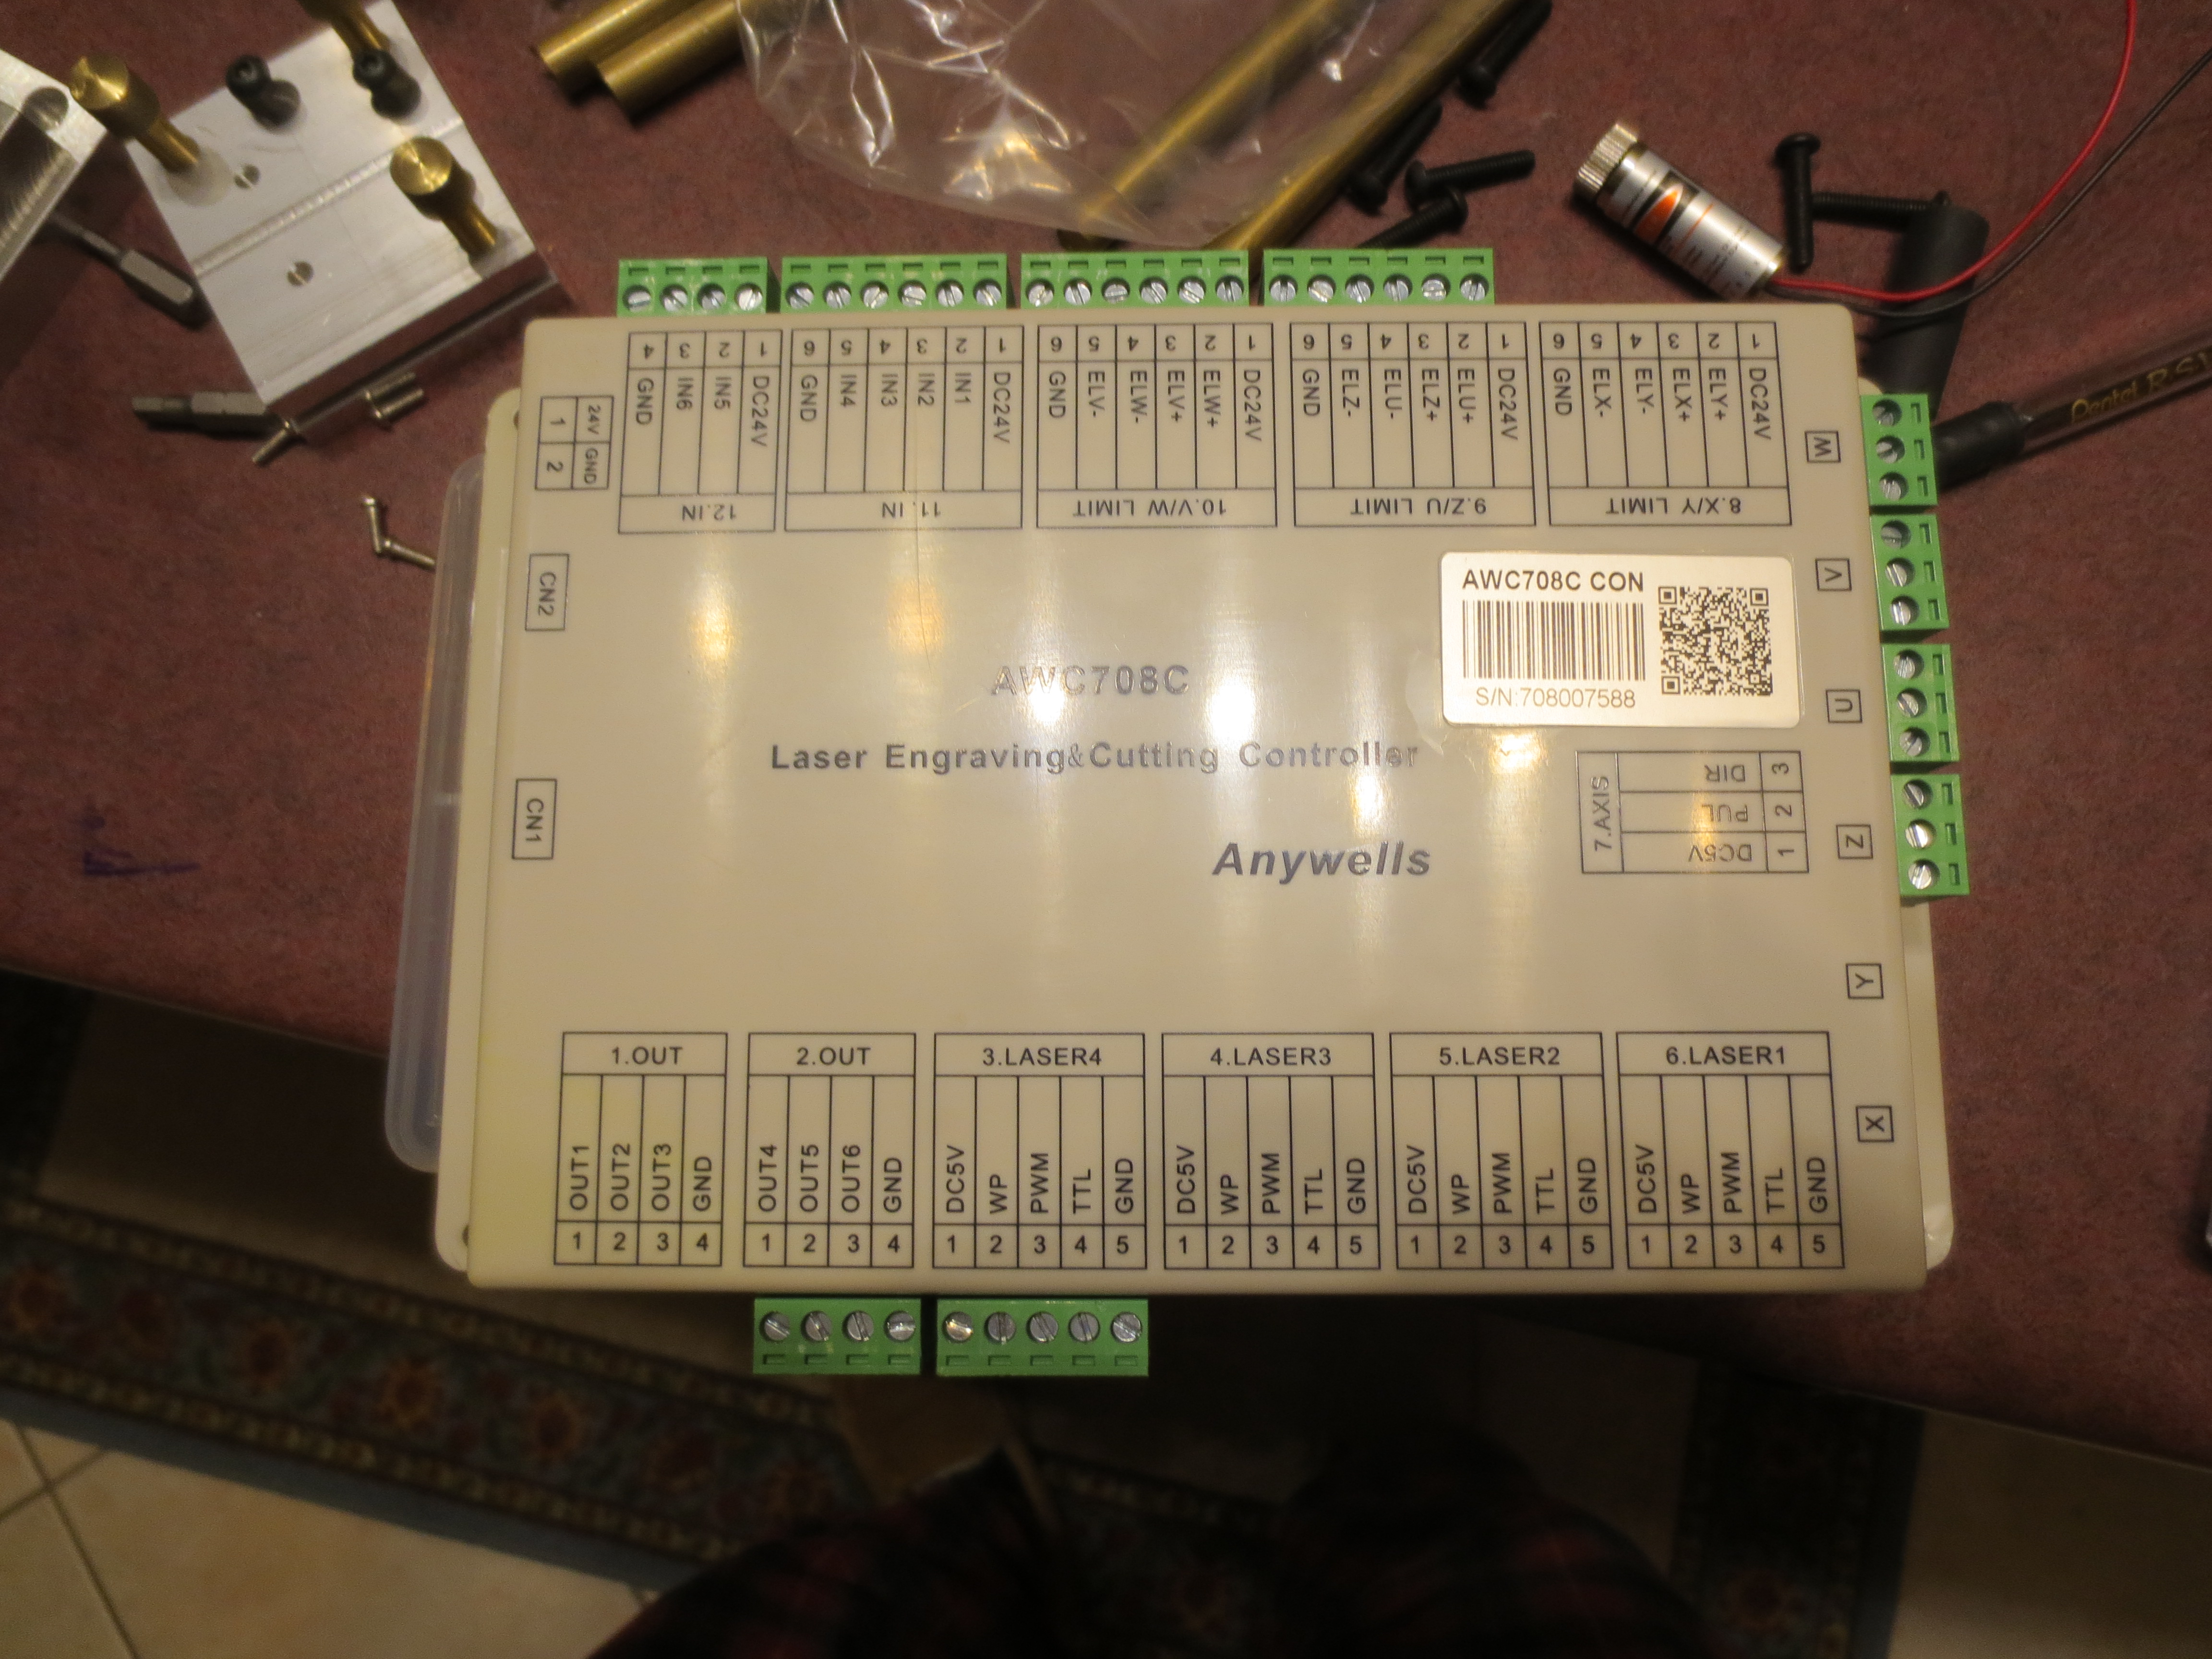
AWC708C Plus Description
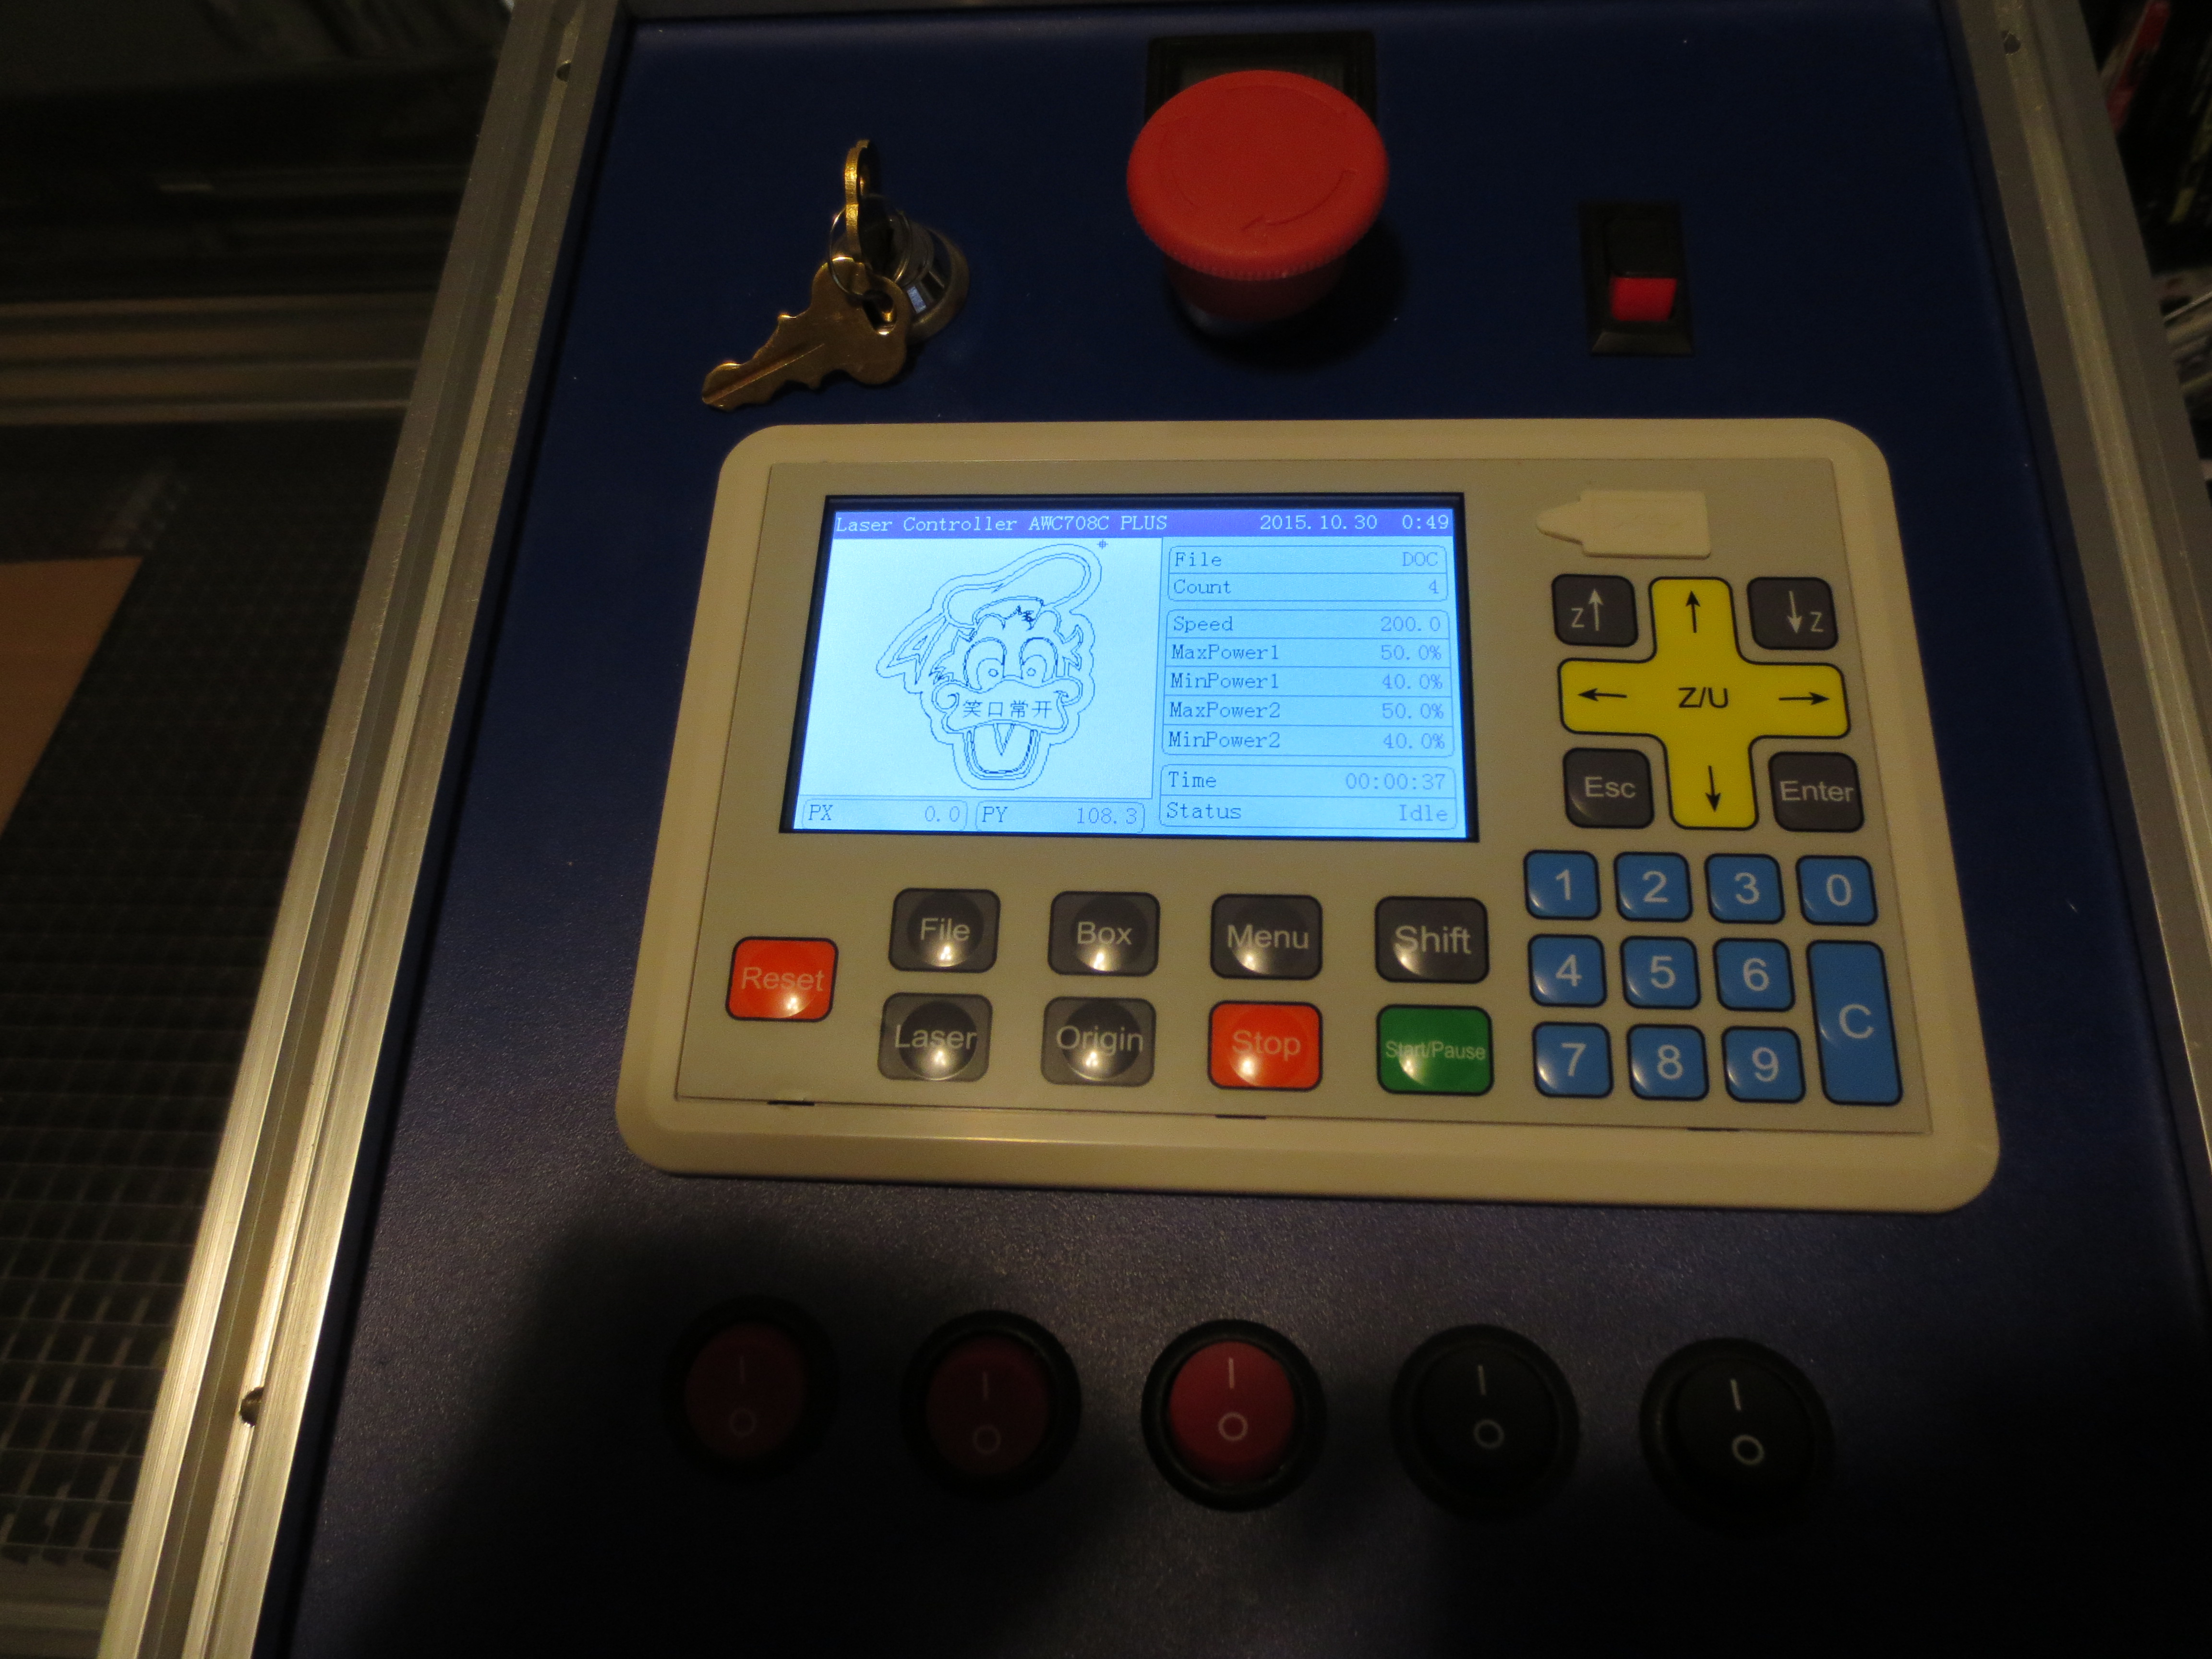
My latest laser controller update included the addition of the AWC708C Plus Laser Engraver & Cutting Controller from www.sinjoe.com. At $399 Plus $65 DHL it is still in the price range of the hobbyist. The brains of the controller are primarily in the control panel. There is now a USB on the control panel (top/right). The Ethernet and USB for controlling the AWC708C are made available from the Control Panel via an umbilical cable. The AWC708C Plus Laser Engraver & Cutting Controller provides a 6-Axis (X, Y, Z, U, V, and W-Axis), 4 laser controls, limit switches, water protection and door lockouts. This controller also uses 24 VDC as input power.
I included links to the manuals provided with the controller and a USB driver for Windows 10.
(Again, not a whole lot of detailed electrical specifications listed; just good enough to get by.)
- Sinjoe Tech Awc708c Plus Controller User Manual SJ 7.10P
- Sinjoe Tech Software LASERCAD User Manual SJ 7.10SF
- USBDriver64
- LaserCAD 8.12
The PASSWORD is still “608” when setting the Manufacturer’s parameters from withing LaserCAD
To access the Display ONLY Manufacturer’s Parameter’s (limit switches..etc.) Press and while holding the <STOP> button and then enter <6> <0><8> from the keypad.
If you have a 708C Lite and want to access the Display ONLY Manufacturer’s Parameter’s (limit switches..etc.) Press and while holding the <STOP> button press <Shift>. No code required.
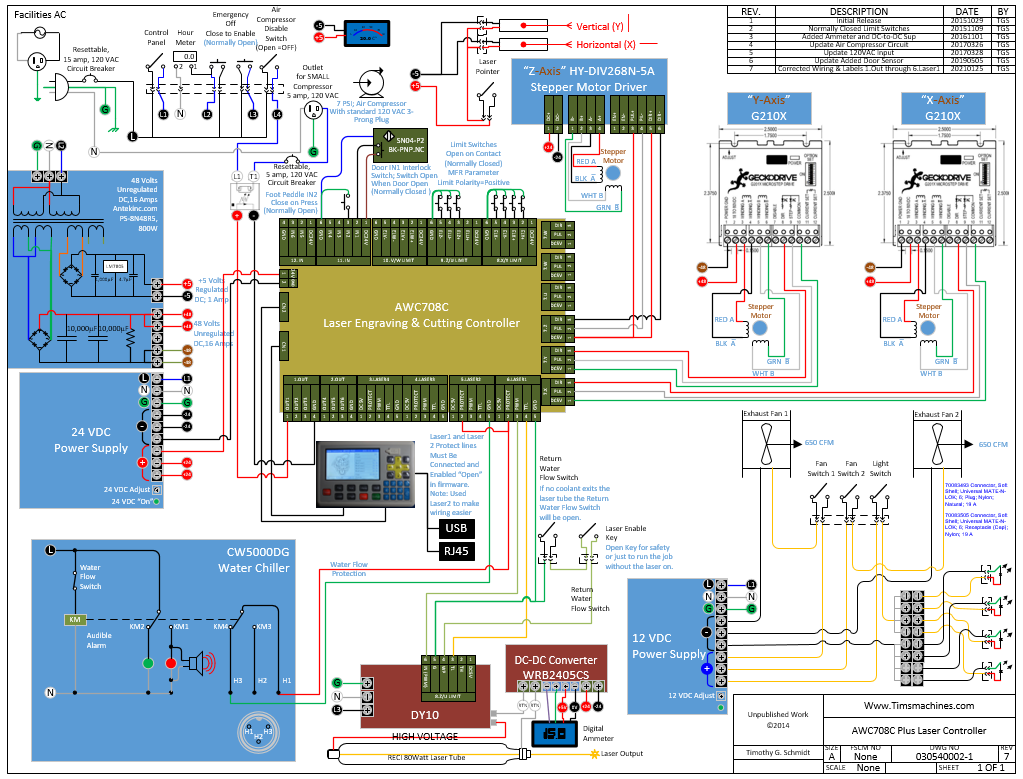
Schematic For AWC708C Plus Laser Controller using Gecko G210X Drives and HY-DIV268N-5A (U)
10/31/2015
I have updated the Co2 Laser Controller to the new Anywells AWC708C Plus Laser Engraver & Cutting Controller. It has a color display that also shows the path of the laser cutter on the display. I guess they do that just in case you cannot see the laser head moving. As a result of the controller upgrade I had to purchase 2 each Gecko model G210X Motor Drives. The output current from the AWC708C Plus was just not strong enough to drive the Gecko Step and DIR signals. The Gecko G210X drives have a universal common on the Step and Dir so you can tie the common to 2.5v, 3.3v, 5v or GND. The added feature of a micro-switch to change the current setting is a plus too; no more resisters needed. I wish they would do that for the microstep setting; it is a pain to take off the cover and move the jumpers around. They are less pricey than the G213V but they work just as well as and are easier to use with the universal STEP/DIR inputs. I should have chosen the Gecko 210x drives to start with; lesson learned.
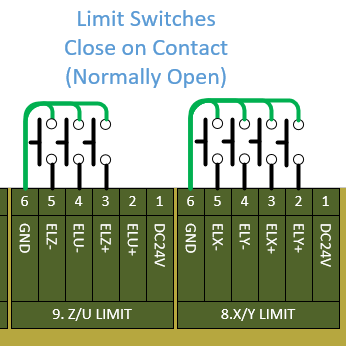
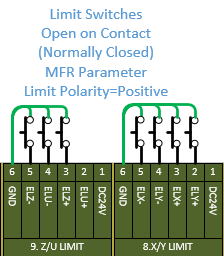
Since I was updating the wiring to the controller, I thought that I would also improve the safety of the machine by changing the limit switches from Normally Opened switches to Normally Closed switches. That way if a wire were to fall off the laser head would stop moving and I would know about it before causing a head crash. Previous schematics used the Normally Opened Limit switch configuration as follows:
Door Open Settings
The IO Parameters for the Foot Switch and Open Protection (Door Open) switch are accessible by entering the password mentioned above. I have my Foot Switch disabled (I did not need one) and the set the IO Parameter for Open Protection = Enable for use as a Door Open switch input. The Open Protection circuit was modified to accommodate the inductive switch shown in the Revision 6 schematic above. Since the switch I used is a normally closed switch, I had to set the controller IO Parameter for the Input Valid Level = High Level.
You can find this switch on Amazon.com:
https://www.amazon.com/gp/product/B07CWRBRZM/ref=ppx_yo_dt_b_asin_title_o05_s00?ie=UTF8&psc=1
Jog Settings
From the main menu (no password required), go to Jog Control. Use the Jog Distance (mm) to set how much the laser head moves with one quick press of the arrow button. This control also sets the relative speed of the jog to some extent; when you hold the button and controller repeats the jog command at some unknown rate.
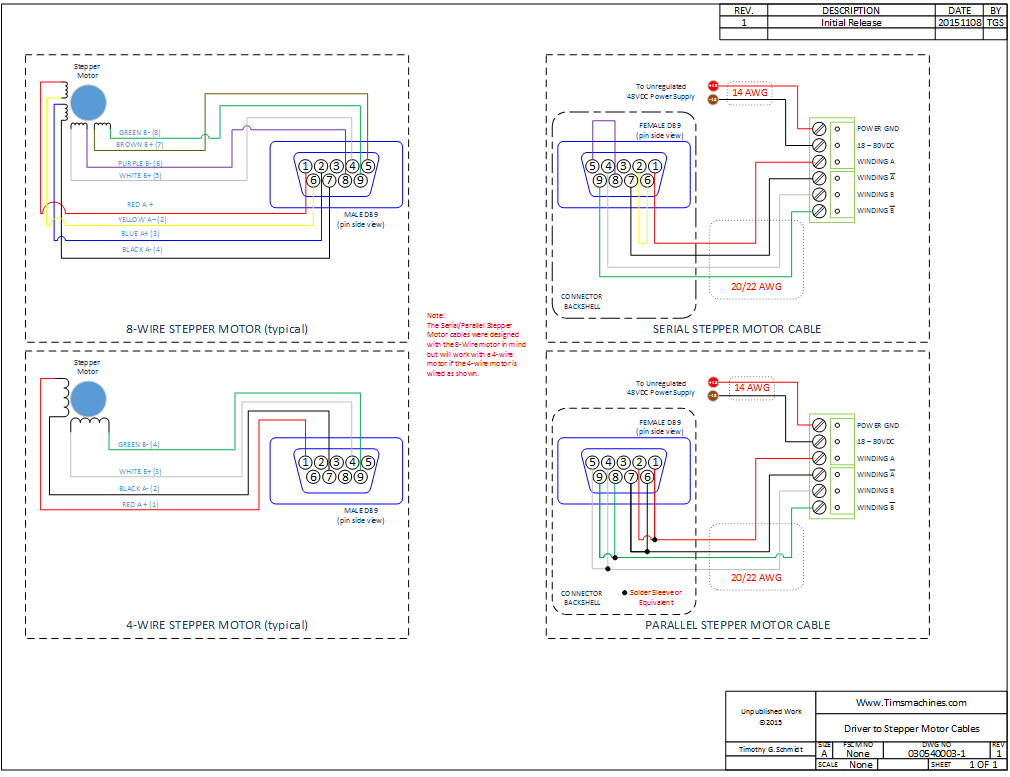
Stepper Motors
To move the laser gantry I now use the same size stepper motors
- 370oz inch for the X-Axis (Old Stepper Motor), Datasheet: 60HS78DE076
-
570oz inch for the X and Y-Axis, Datasheet: KL23H2100-50-8B
The original design I chose a smaller stepper for the X-Axis. The reason I chose a smaller motor for the X-Axis was that the X-Axis motor did not have to move the same mass that the Y-Axis had to. The X-Axis only has to move the laser head. The Y-Axis has to move the X-Axis gantry, the X-Axis motor, the laser head, plus the cabling and tubing. Using a bigger motor allows you to move more mass faster but adds mass to the system. Making the X-Axis motor smaller allows the Y-Axis motor to move less mass.
10/31/2015: I just changed out the 370oz-in X-Axis and put in a 570oz-in stepper. This change was needed when I increased the speed of the X-Axis swing for engraving.
Originally To power the drivers I chose 2 24vdc power supplies from EBay NEW High Quality 24V DC 15A 360W Regulated Switching Power Supply Transformer from the US. The reason I went with two power supplies was that I wanted to separate the X & Y-Axis power from the controller power (yes, maybe overdone). They were $27.95 each with free shipping; why not. Later on I found this choice of power supply to be a mistake!!
Stepper motor drivers like to have raw unregulated power going to them. Stepper motors work faster and have stronger holding power at higher voltages but higher voltages can result in over heating the motor. I chose 24 vdc to drive the motors because I thought that the speed and torque would be “good enough”; I was wrong and stalled the stepper motor trying to move the X-Axis mass too fast without enough torque. Watch this…
Stepper Motor Stalling…
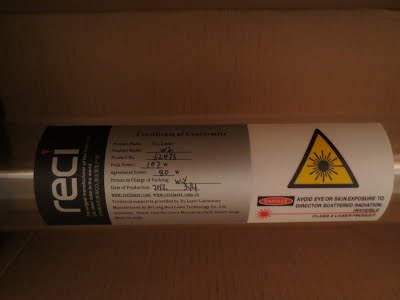
Laser Tube
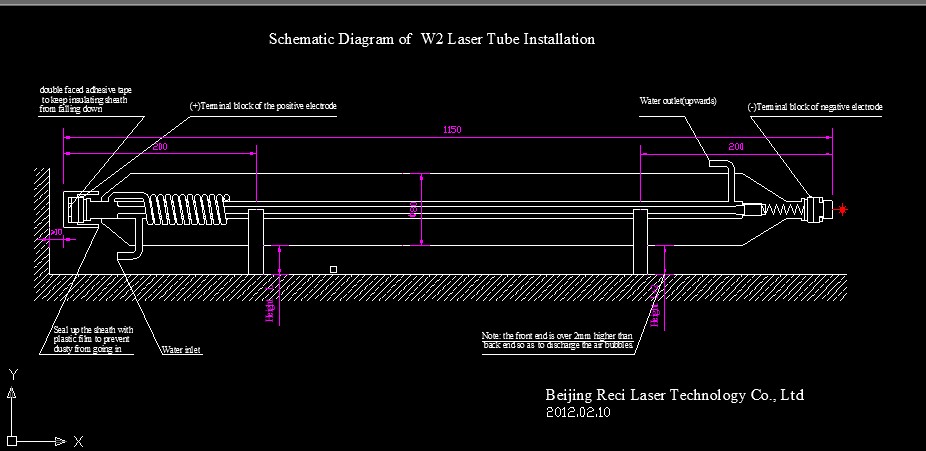

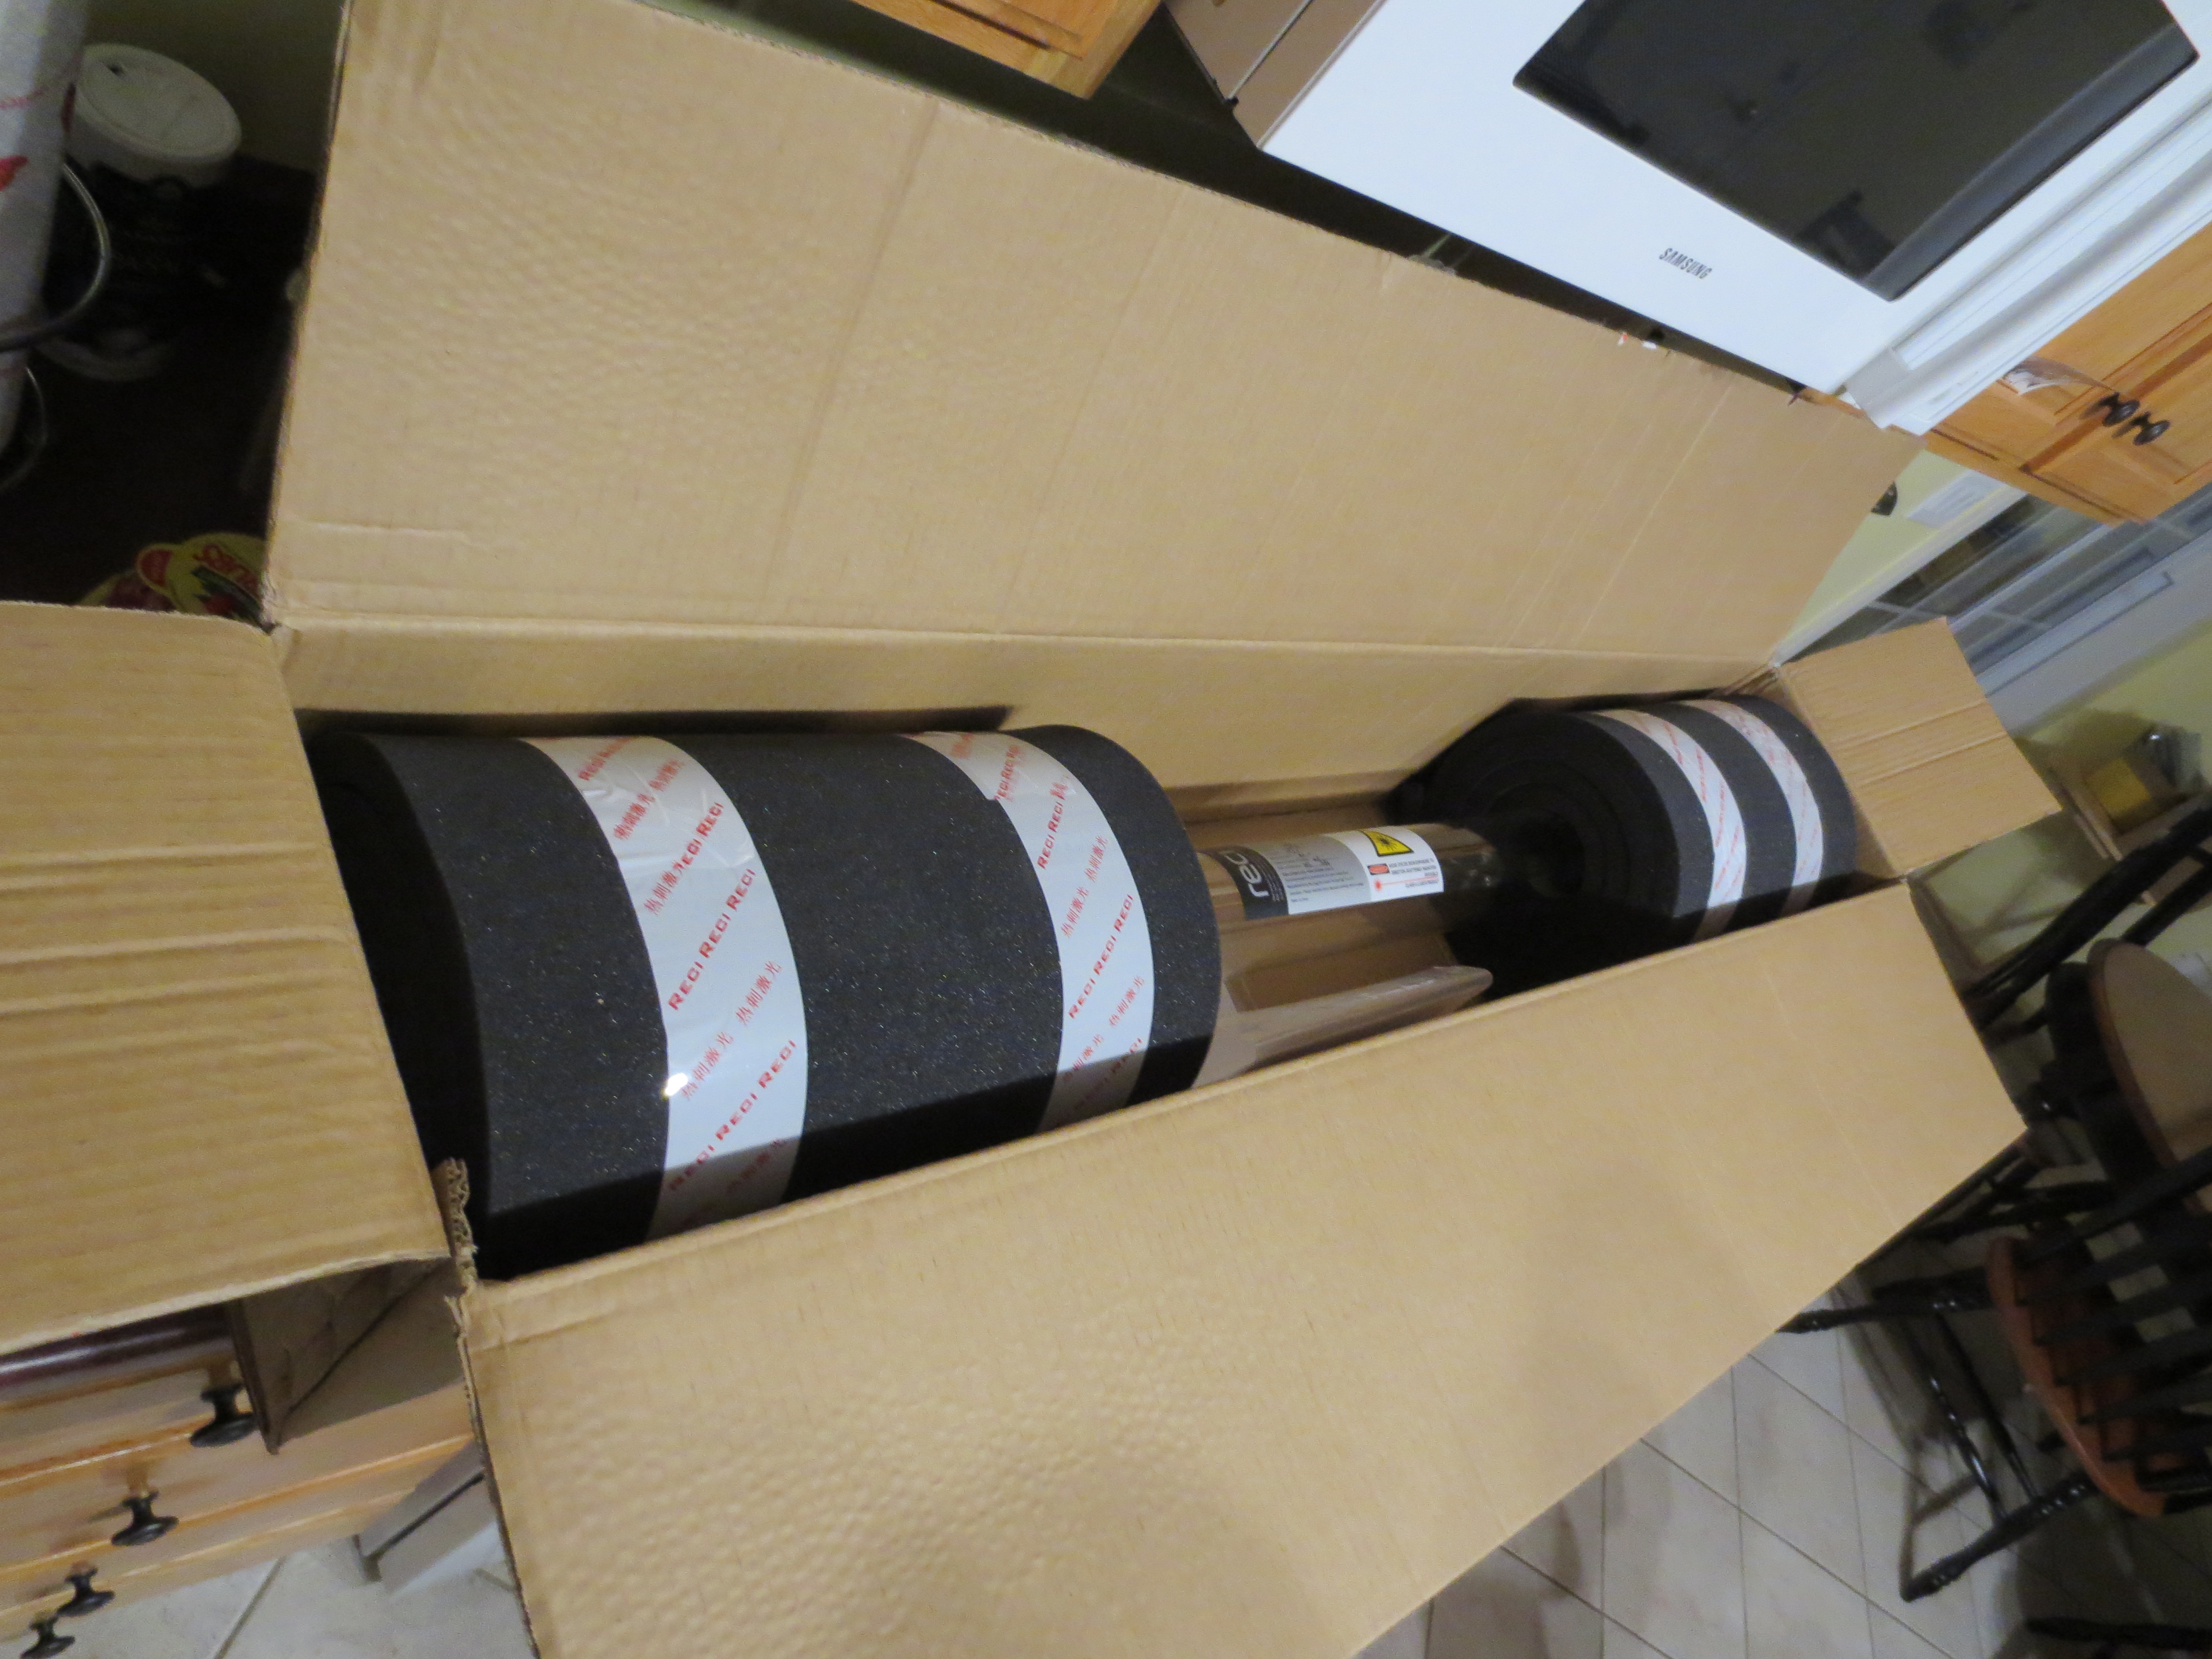
80 Watt W2 RECI Laser Tube
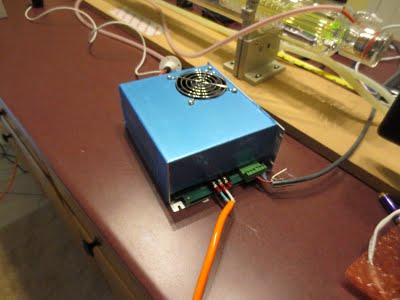
DY10 High Voltage DC Laser Tube Power Supply
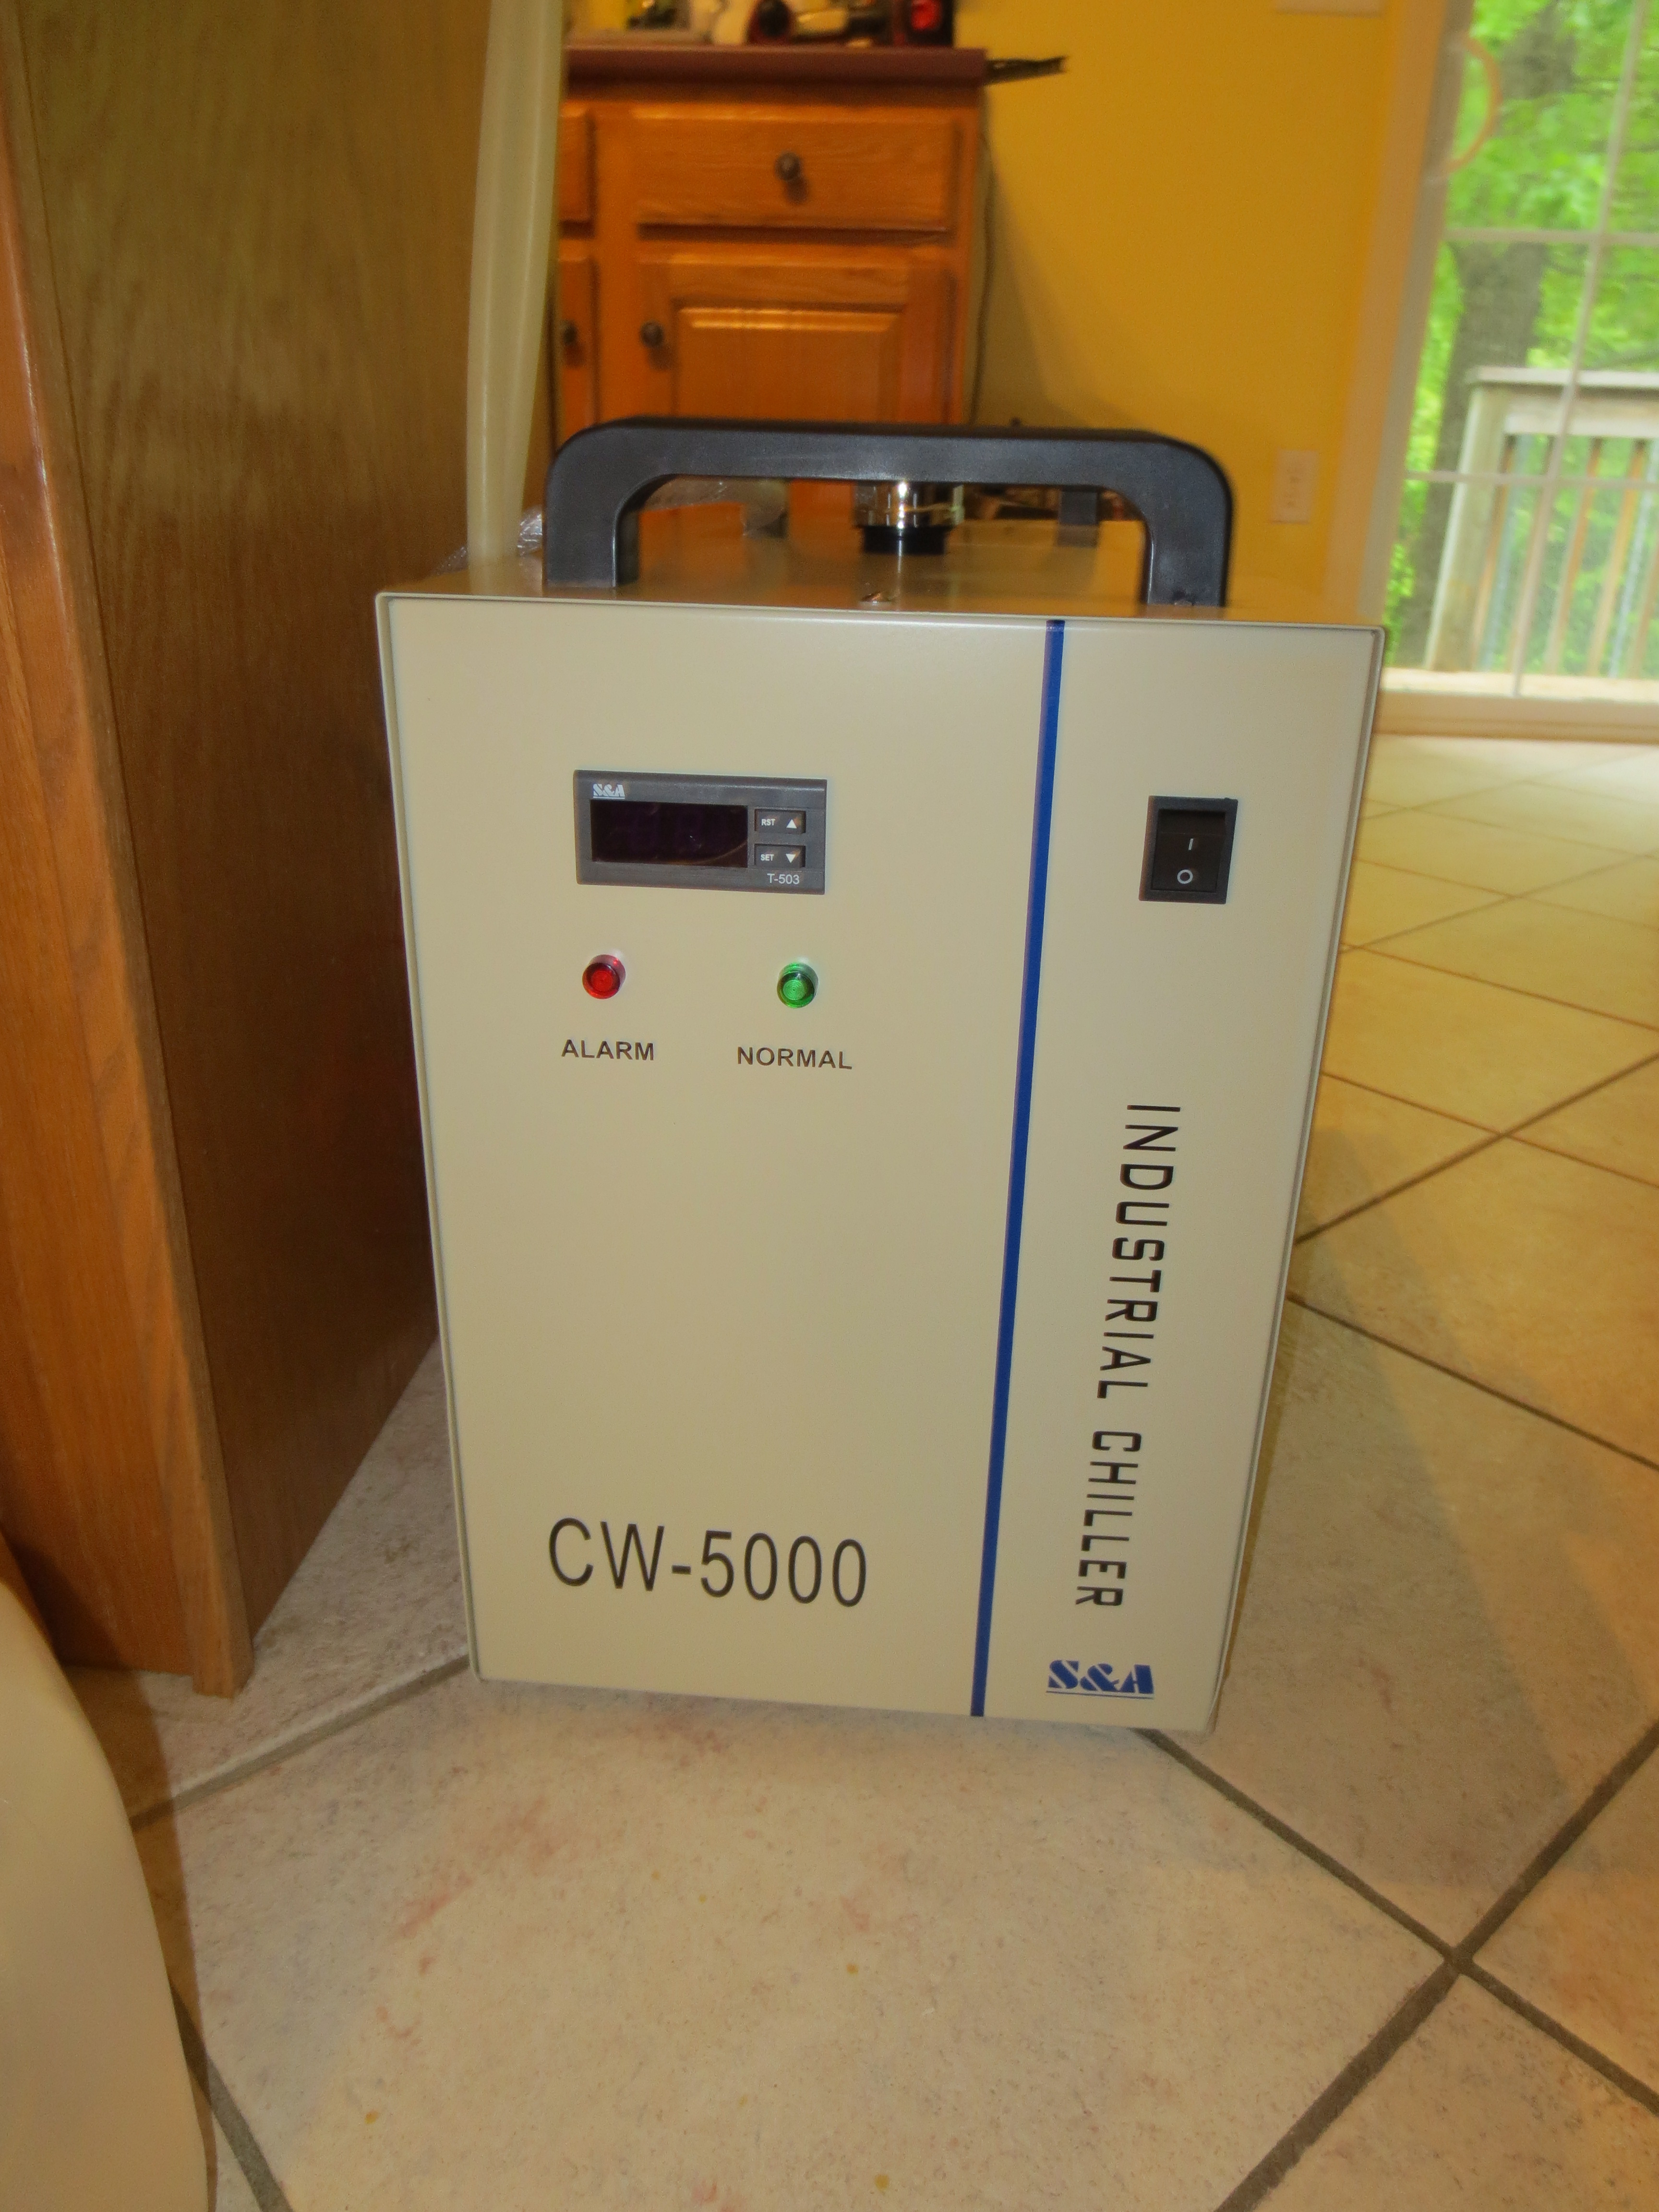
Laser Cooling
You can purchase a water chiller or cooler from www.lightobject.com or www.aliexpress.com. The size of your cooler/chiller depends upon the size of your laser tube and the amount of time your laser is turned on. A cool laser is a happy laser!! I chose the CW5000DG Water Chiller to keep my 80 Watt Laser Tube cool. I received my chiller as part of a package deal. Note I used Prestone antifreeze as the coolant for my laser; no signs of corrosion or cooling problems.

Auxiliary Laser Functions
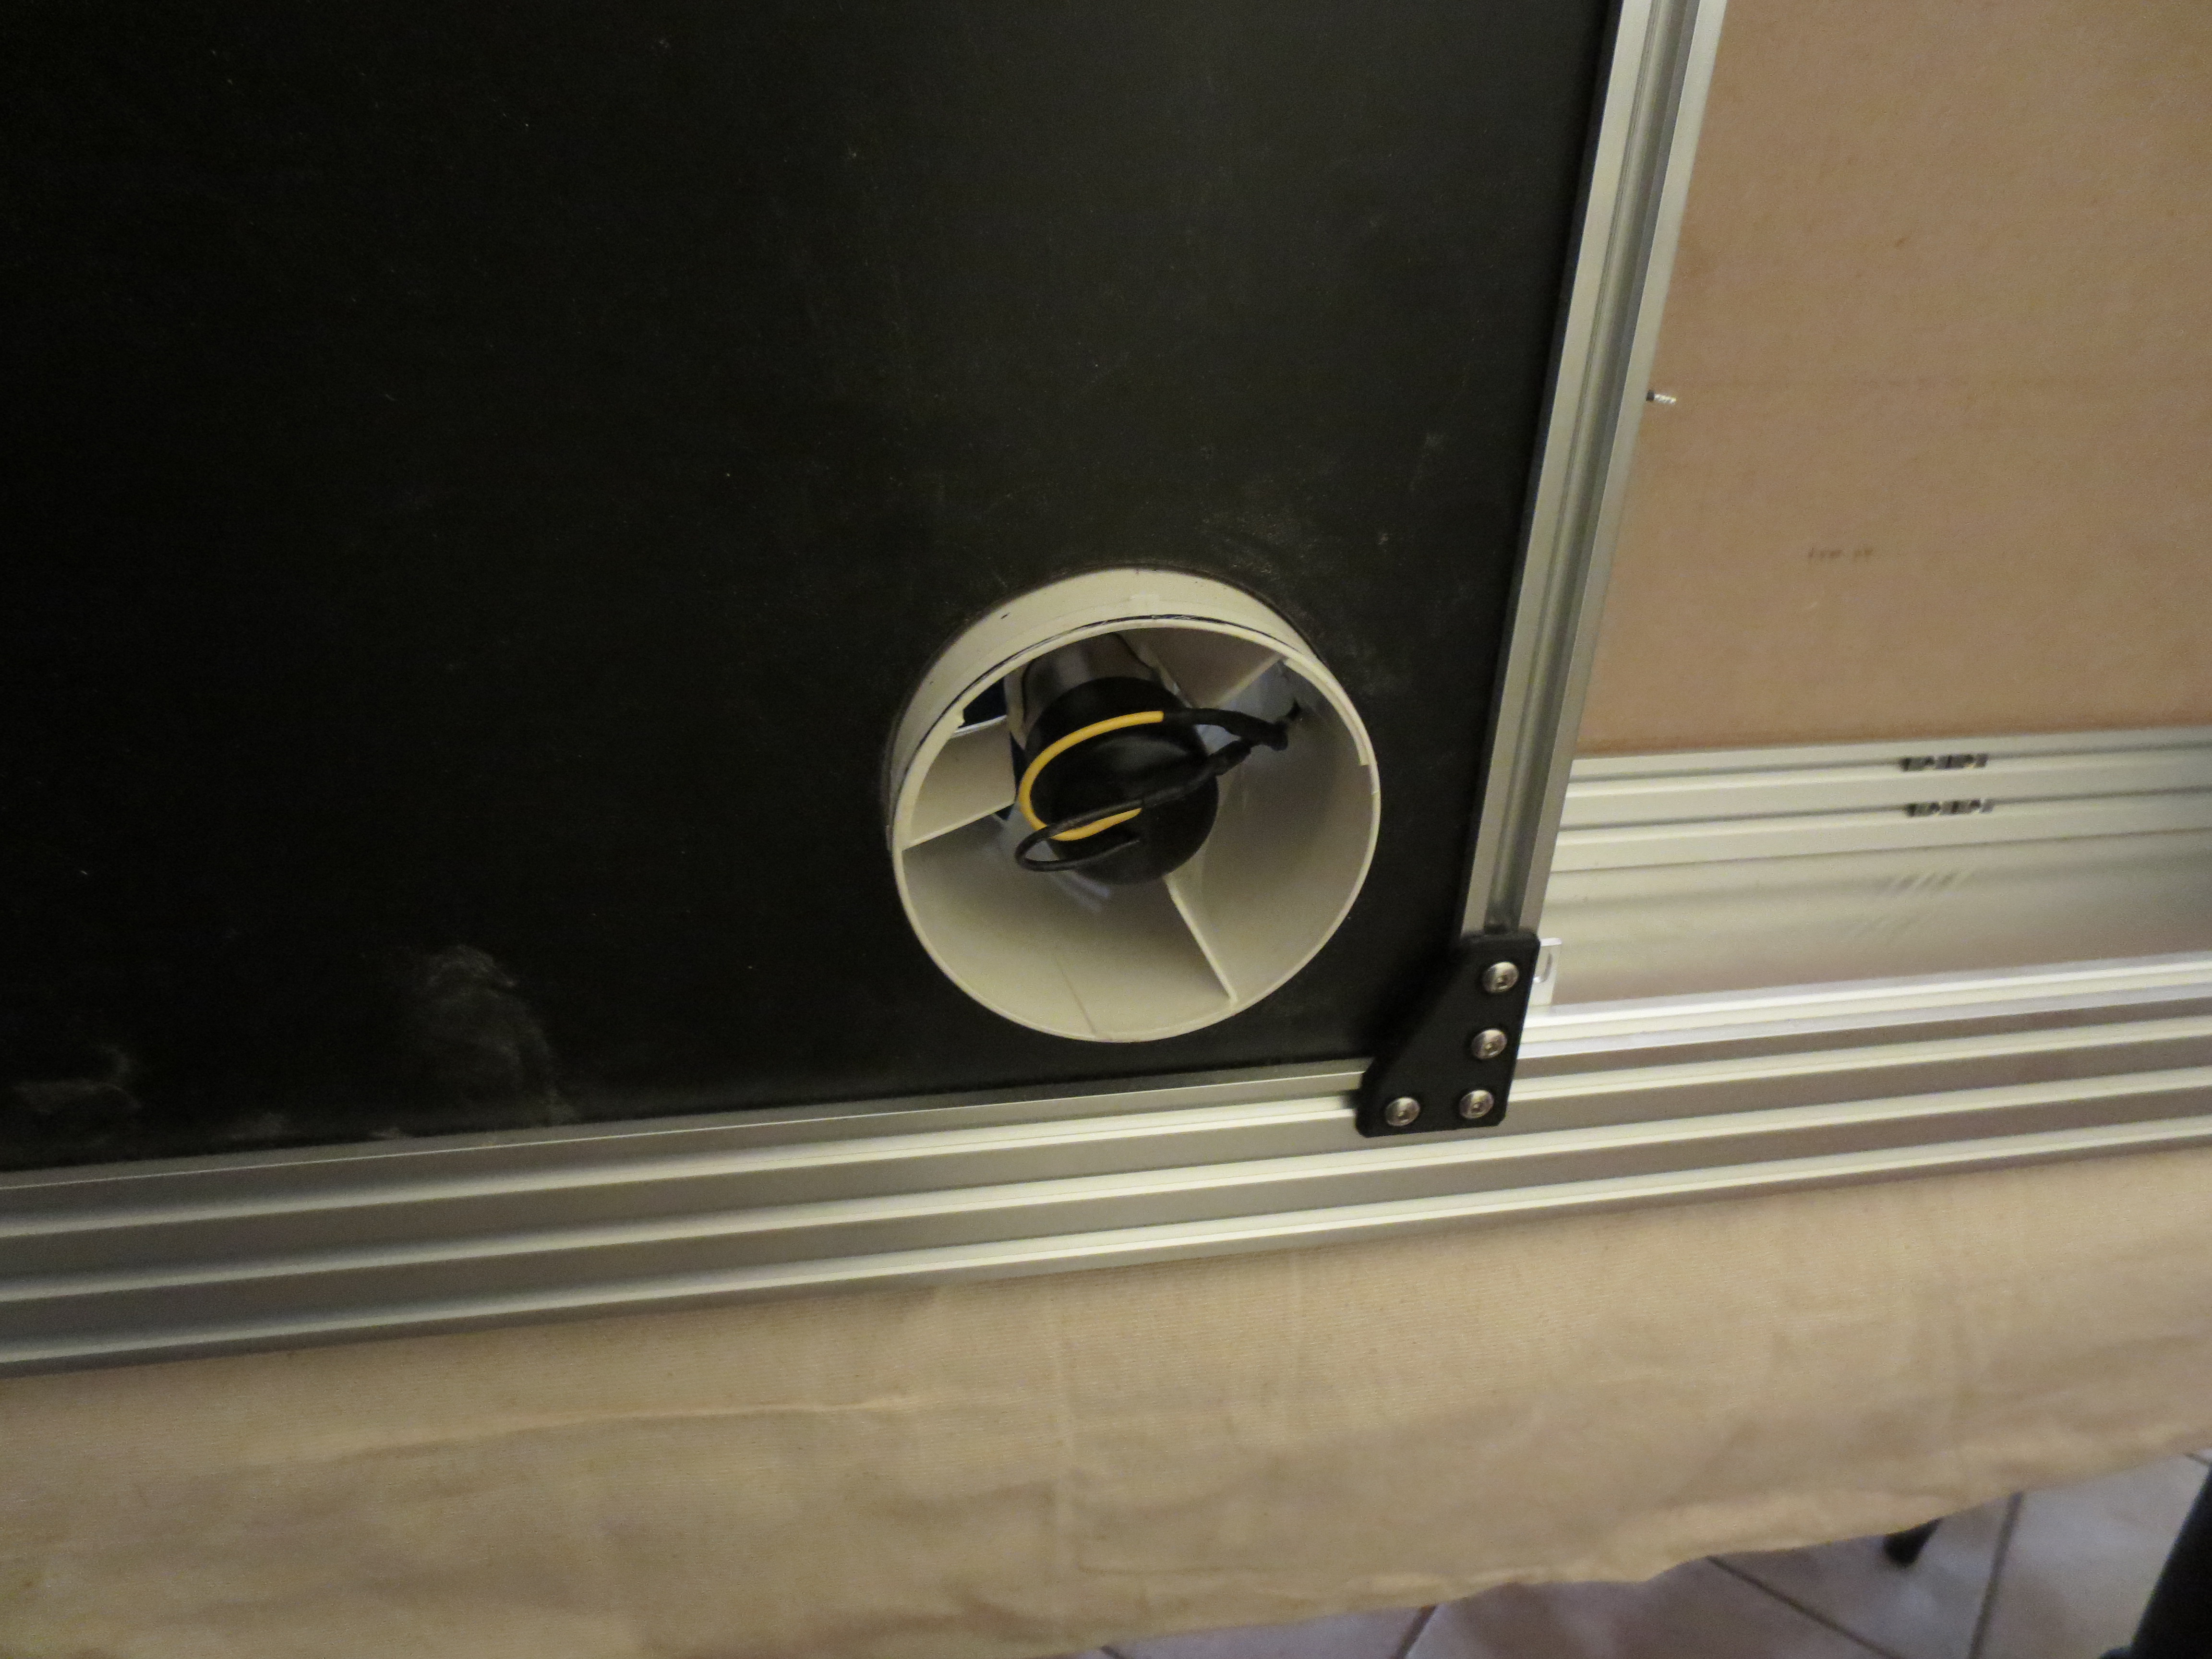
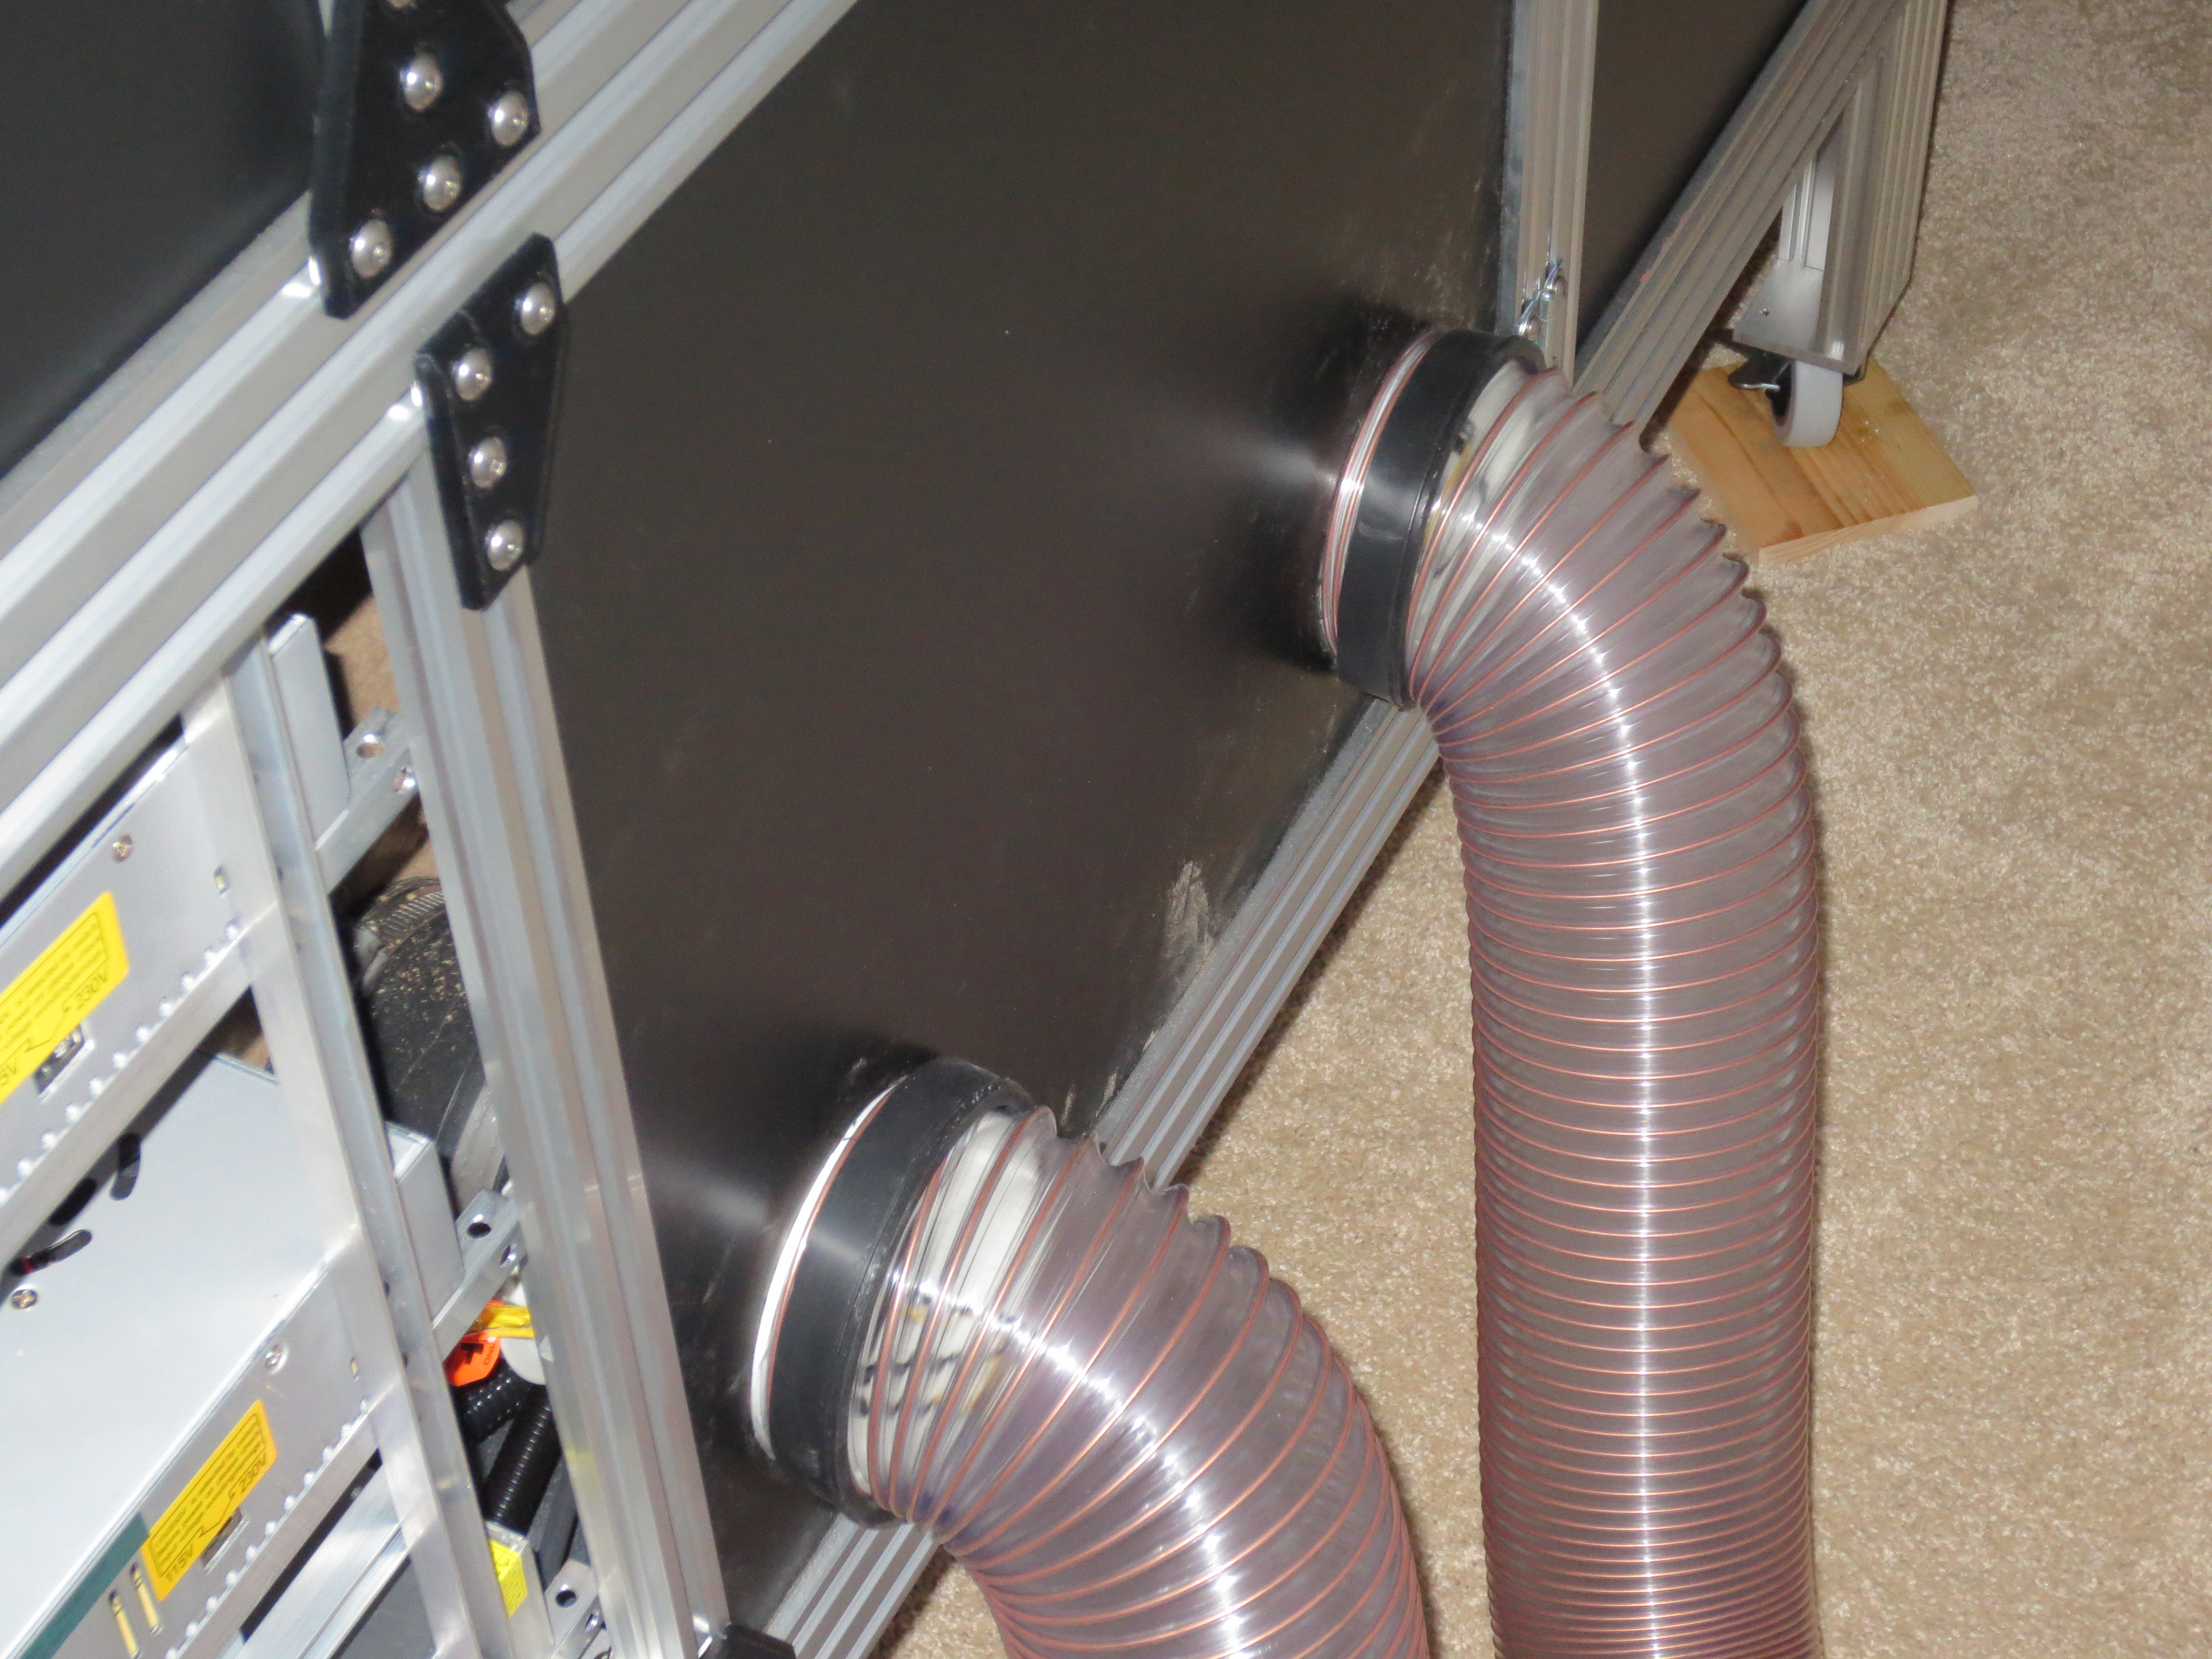
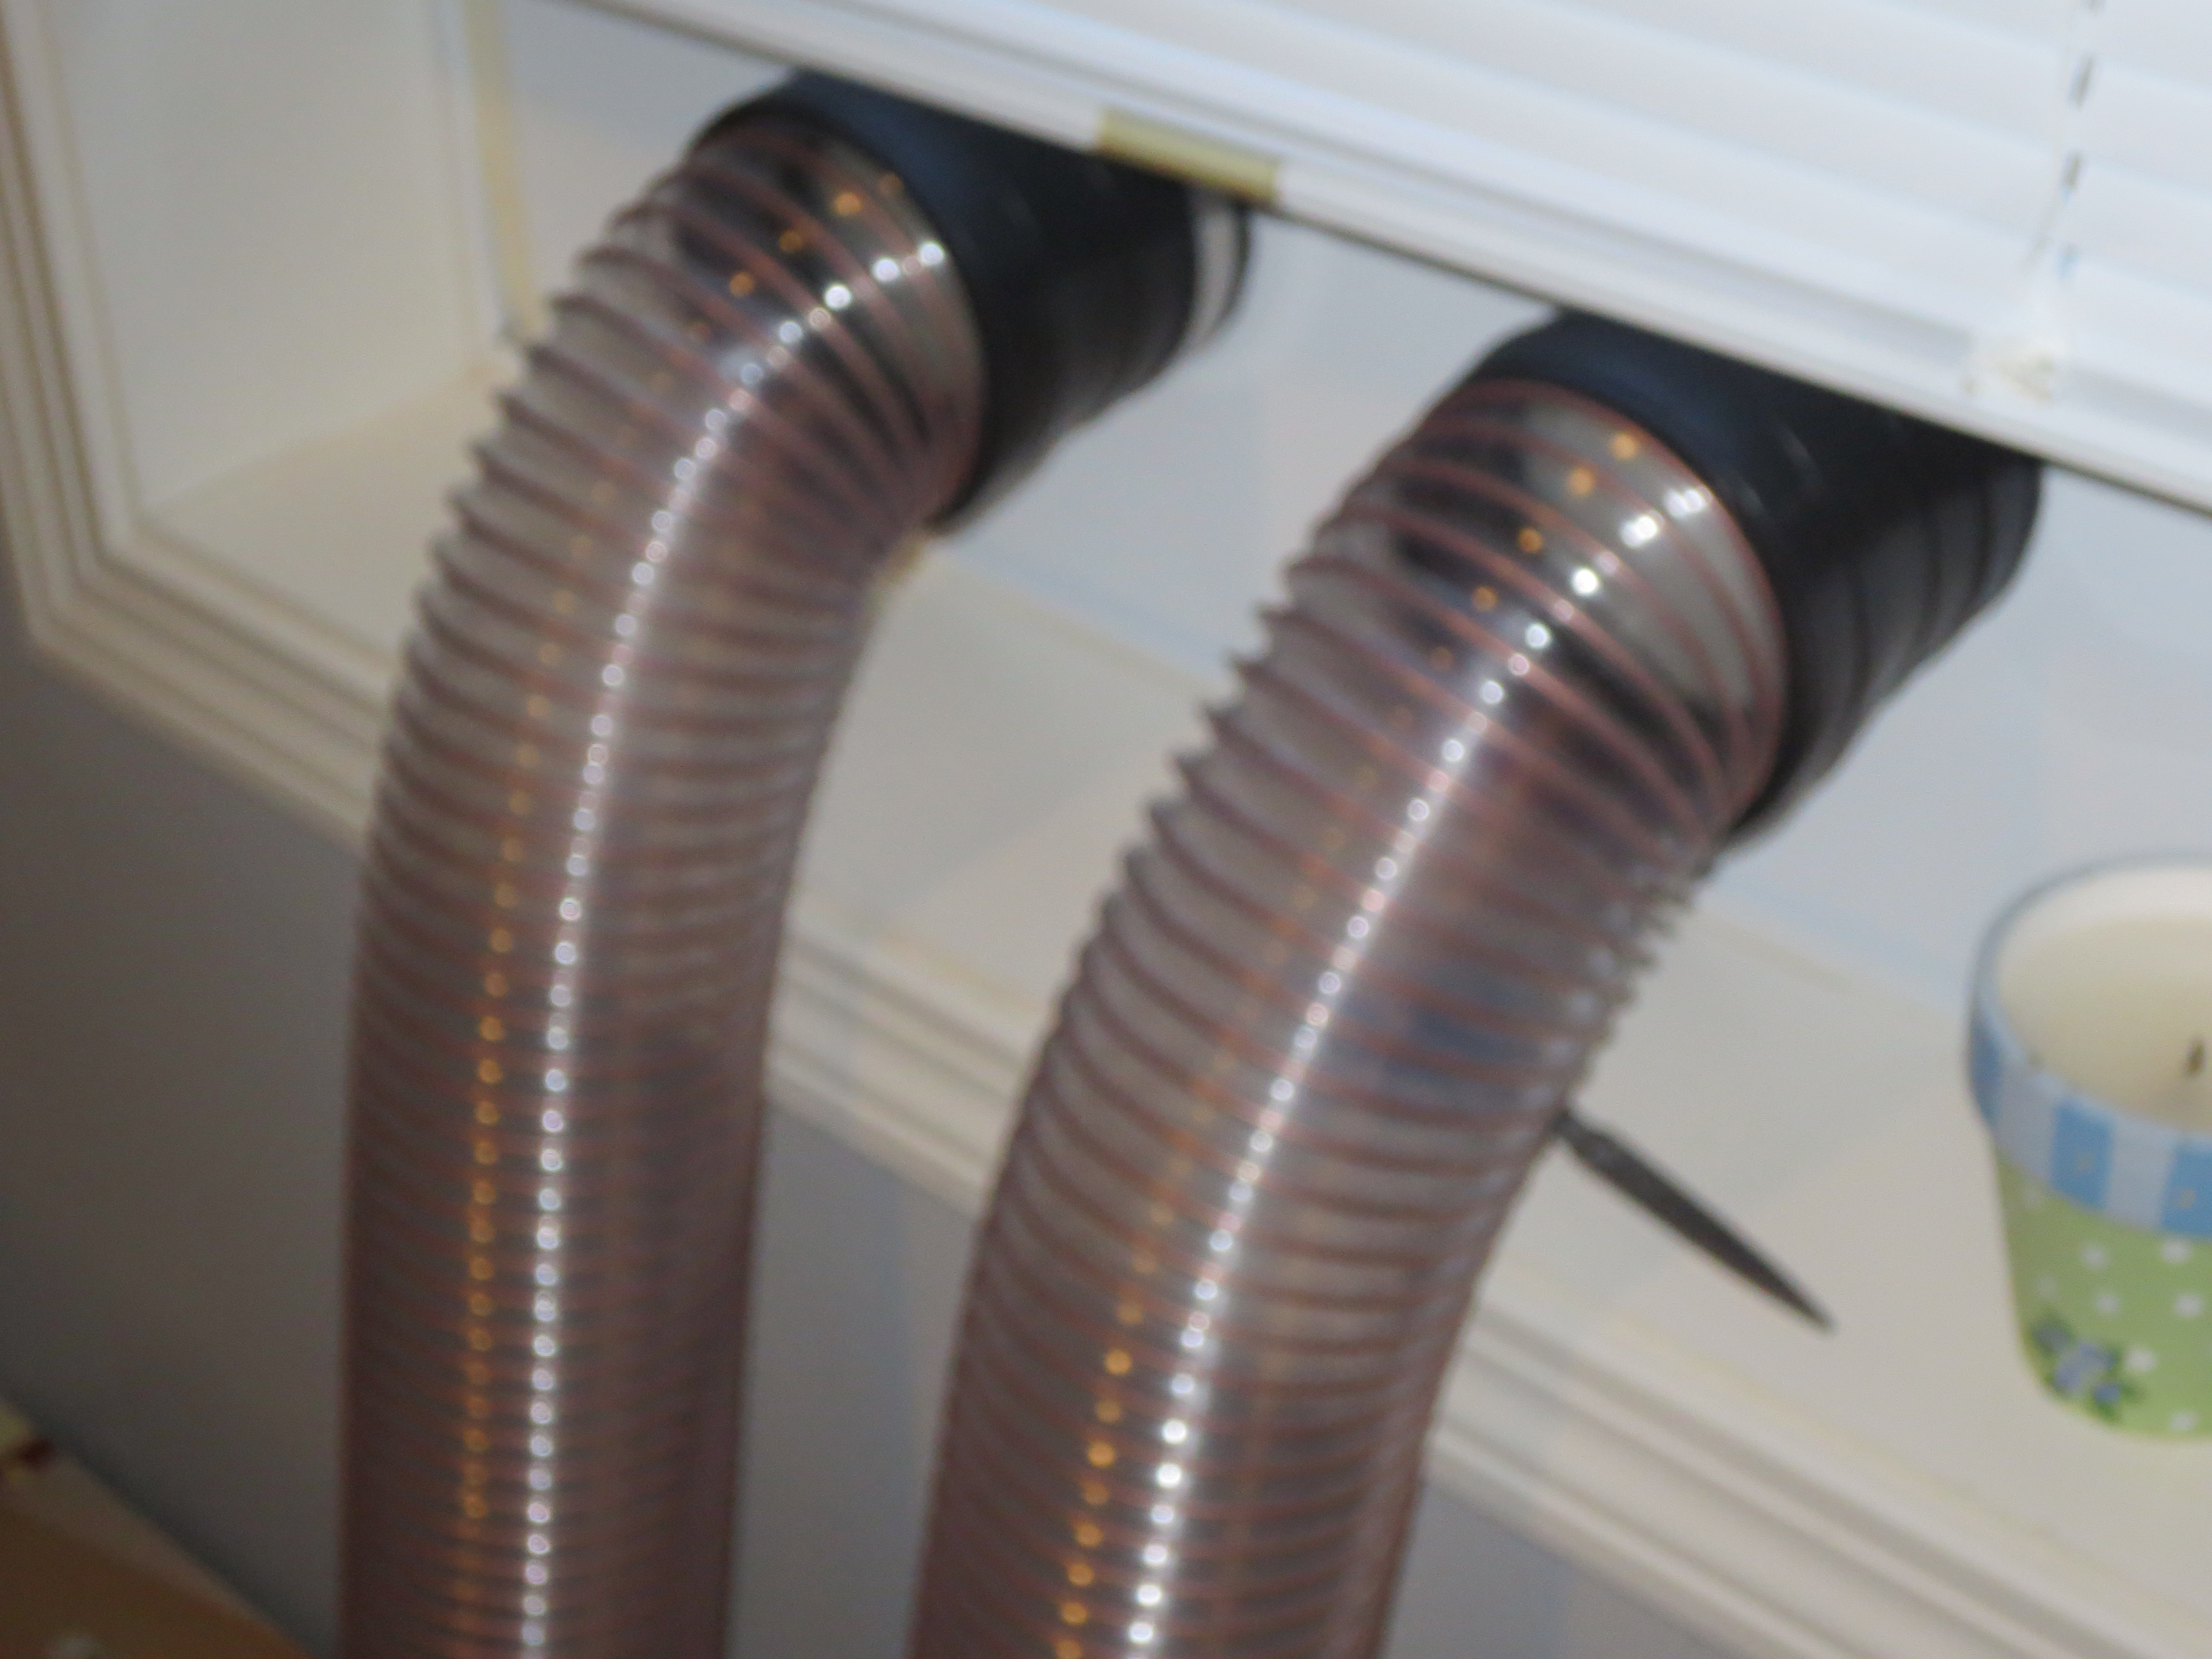
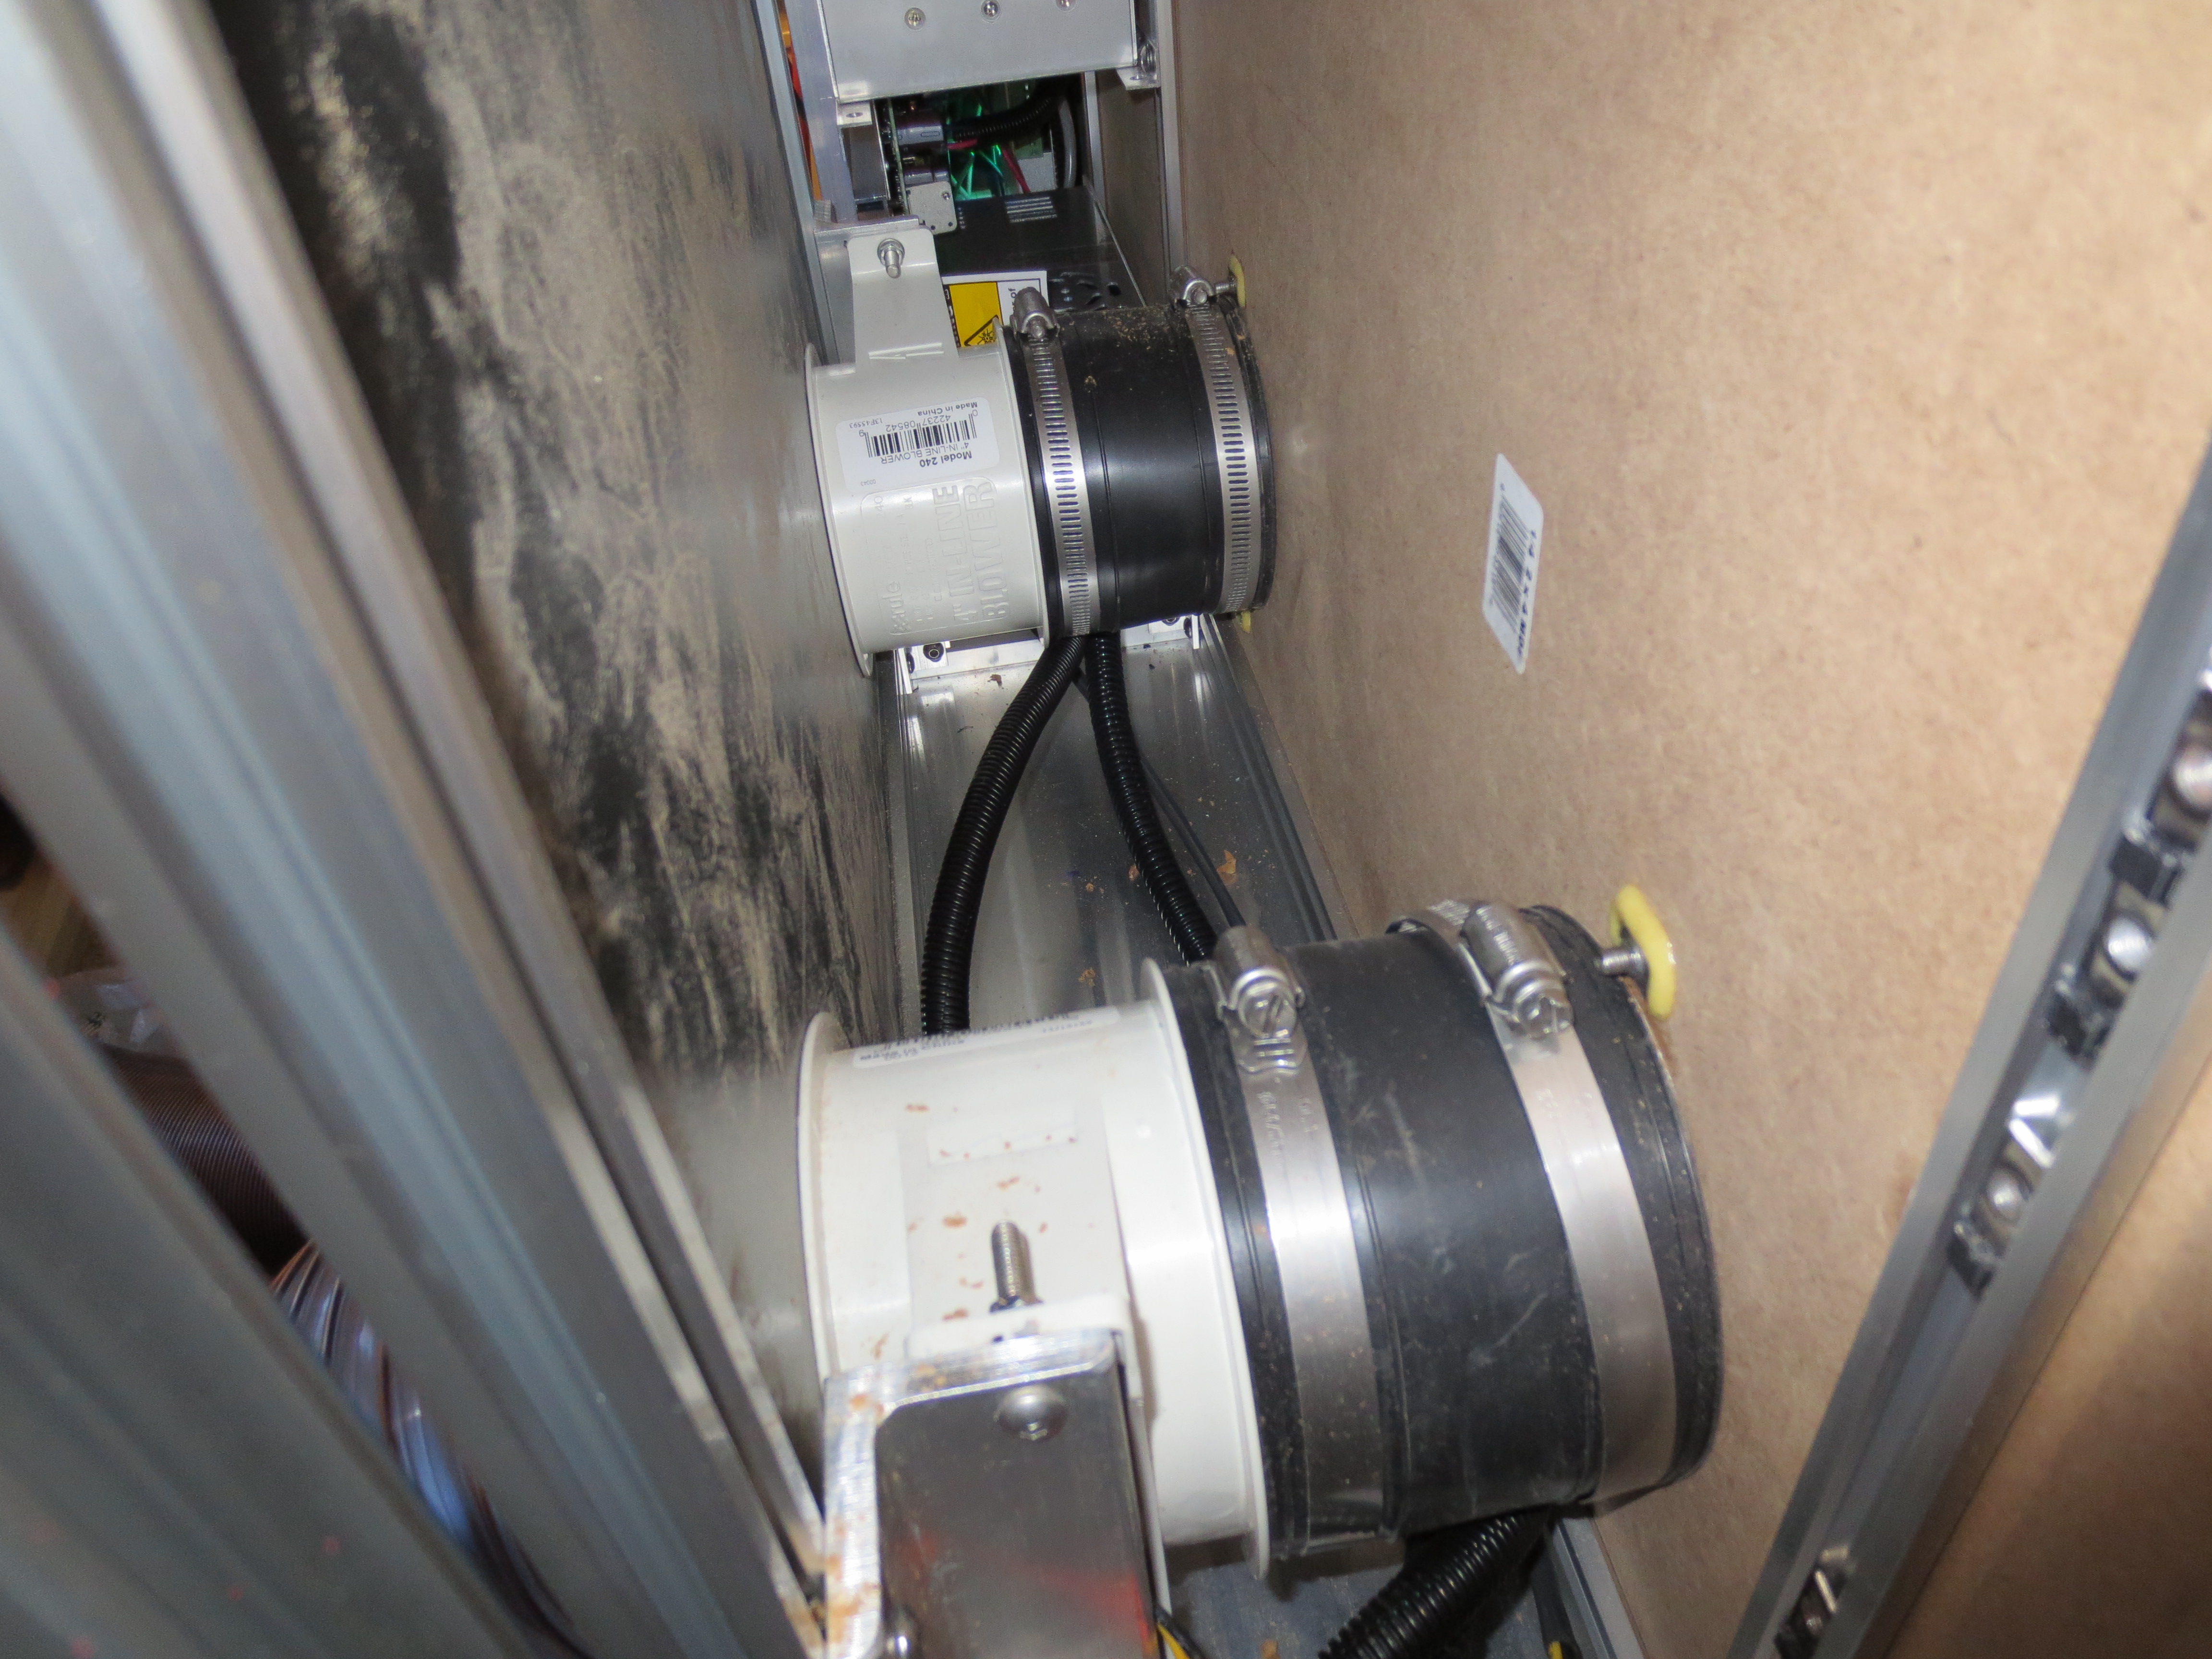
Exhaust


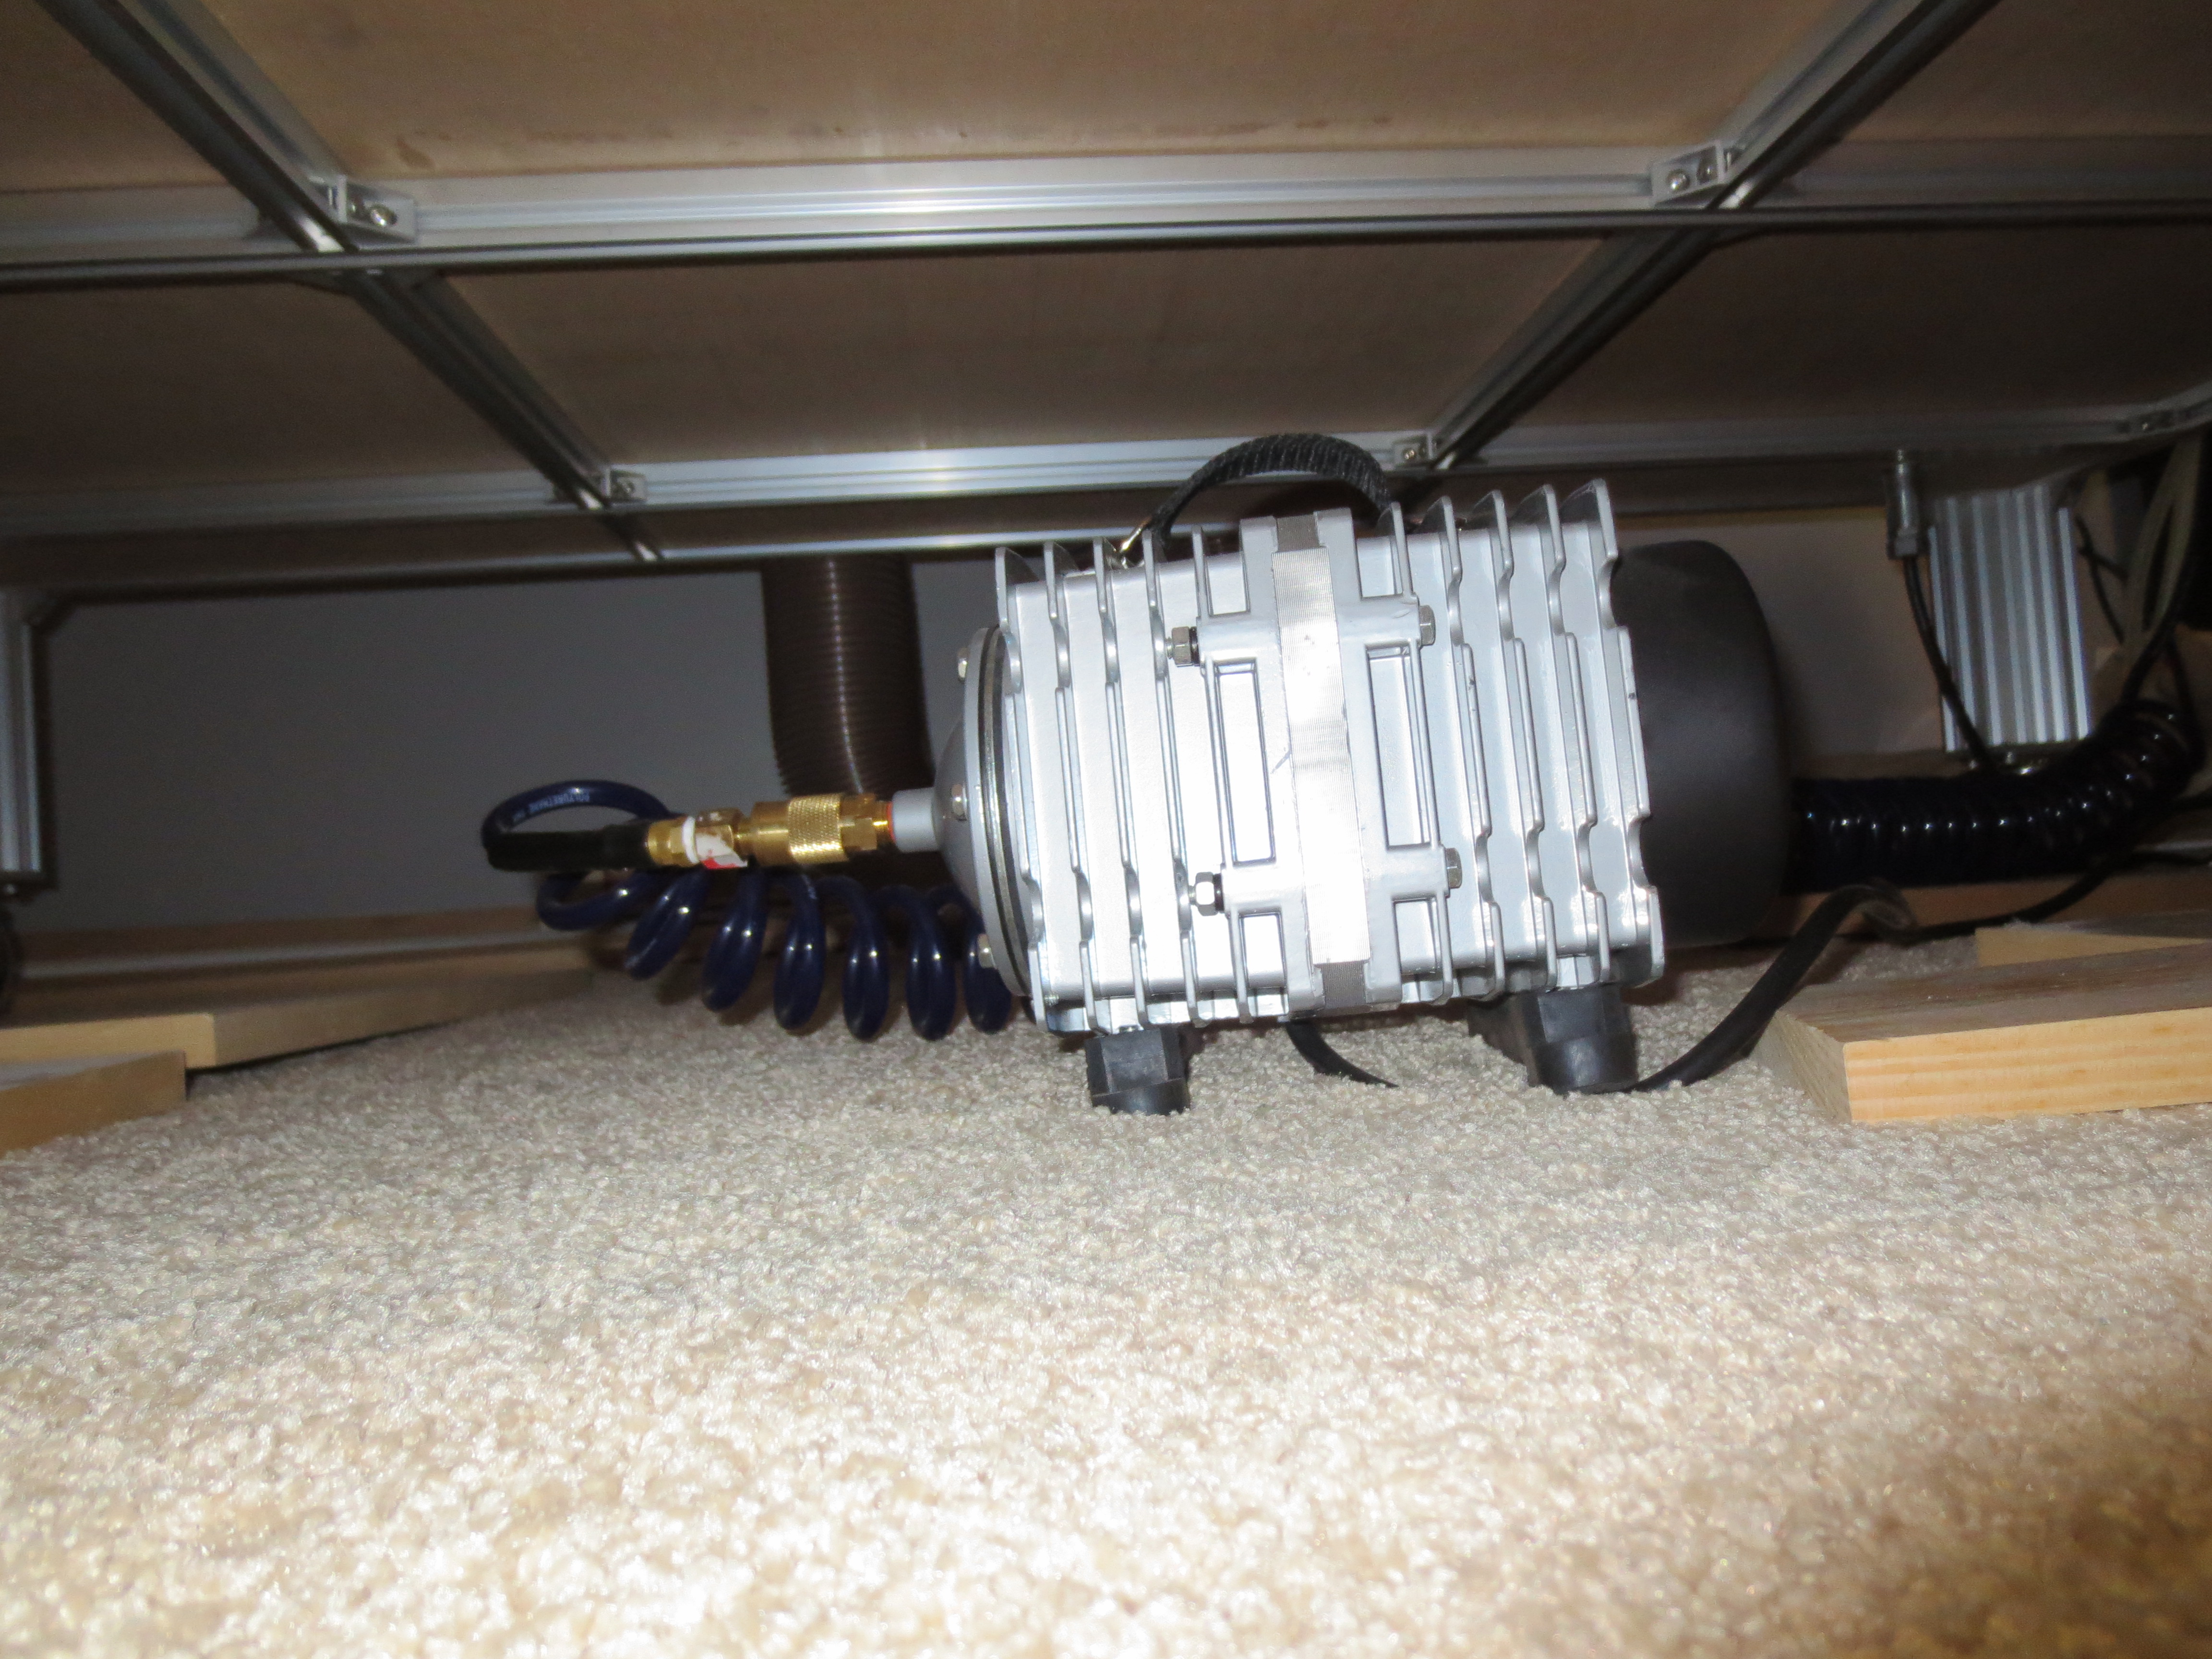
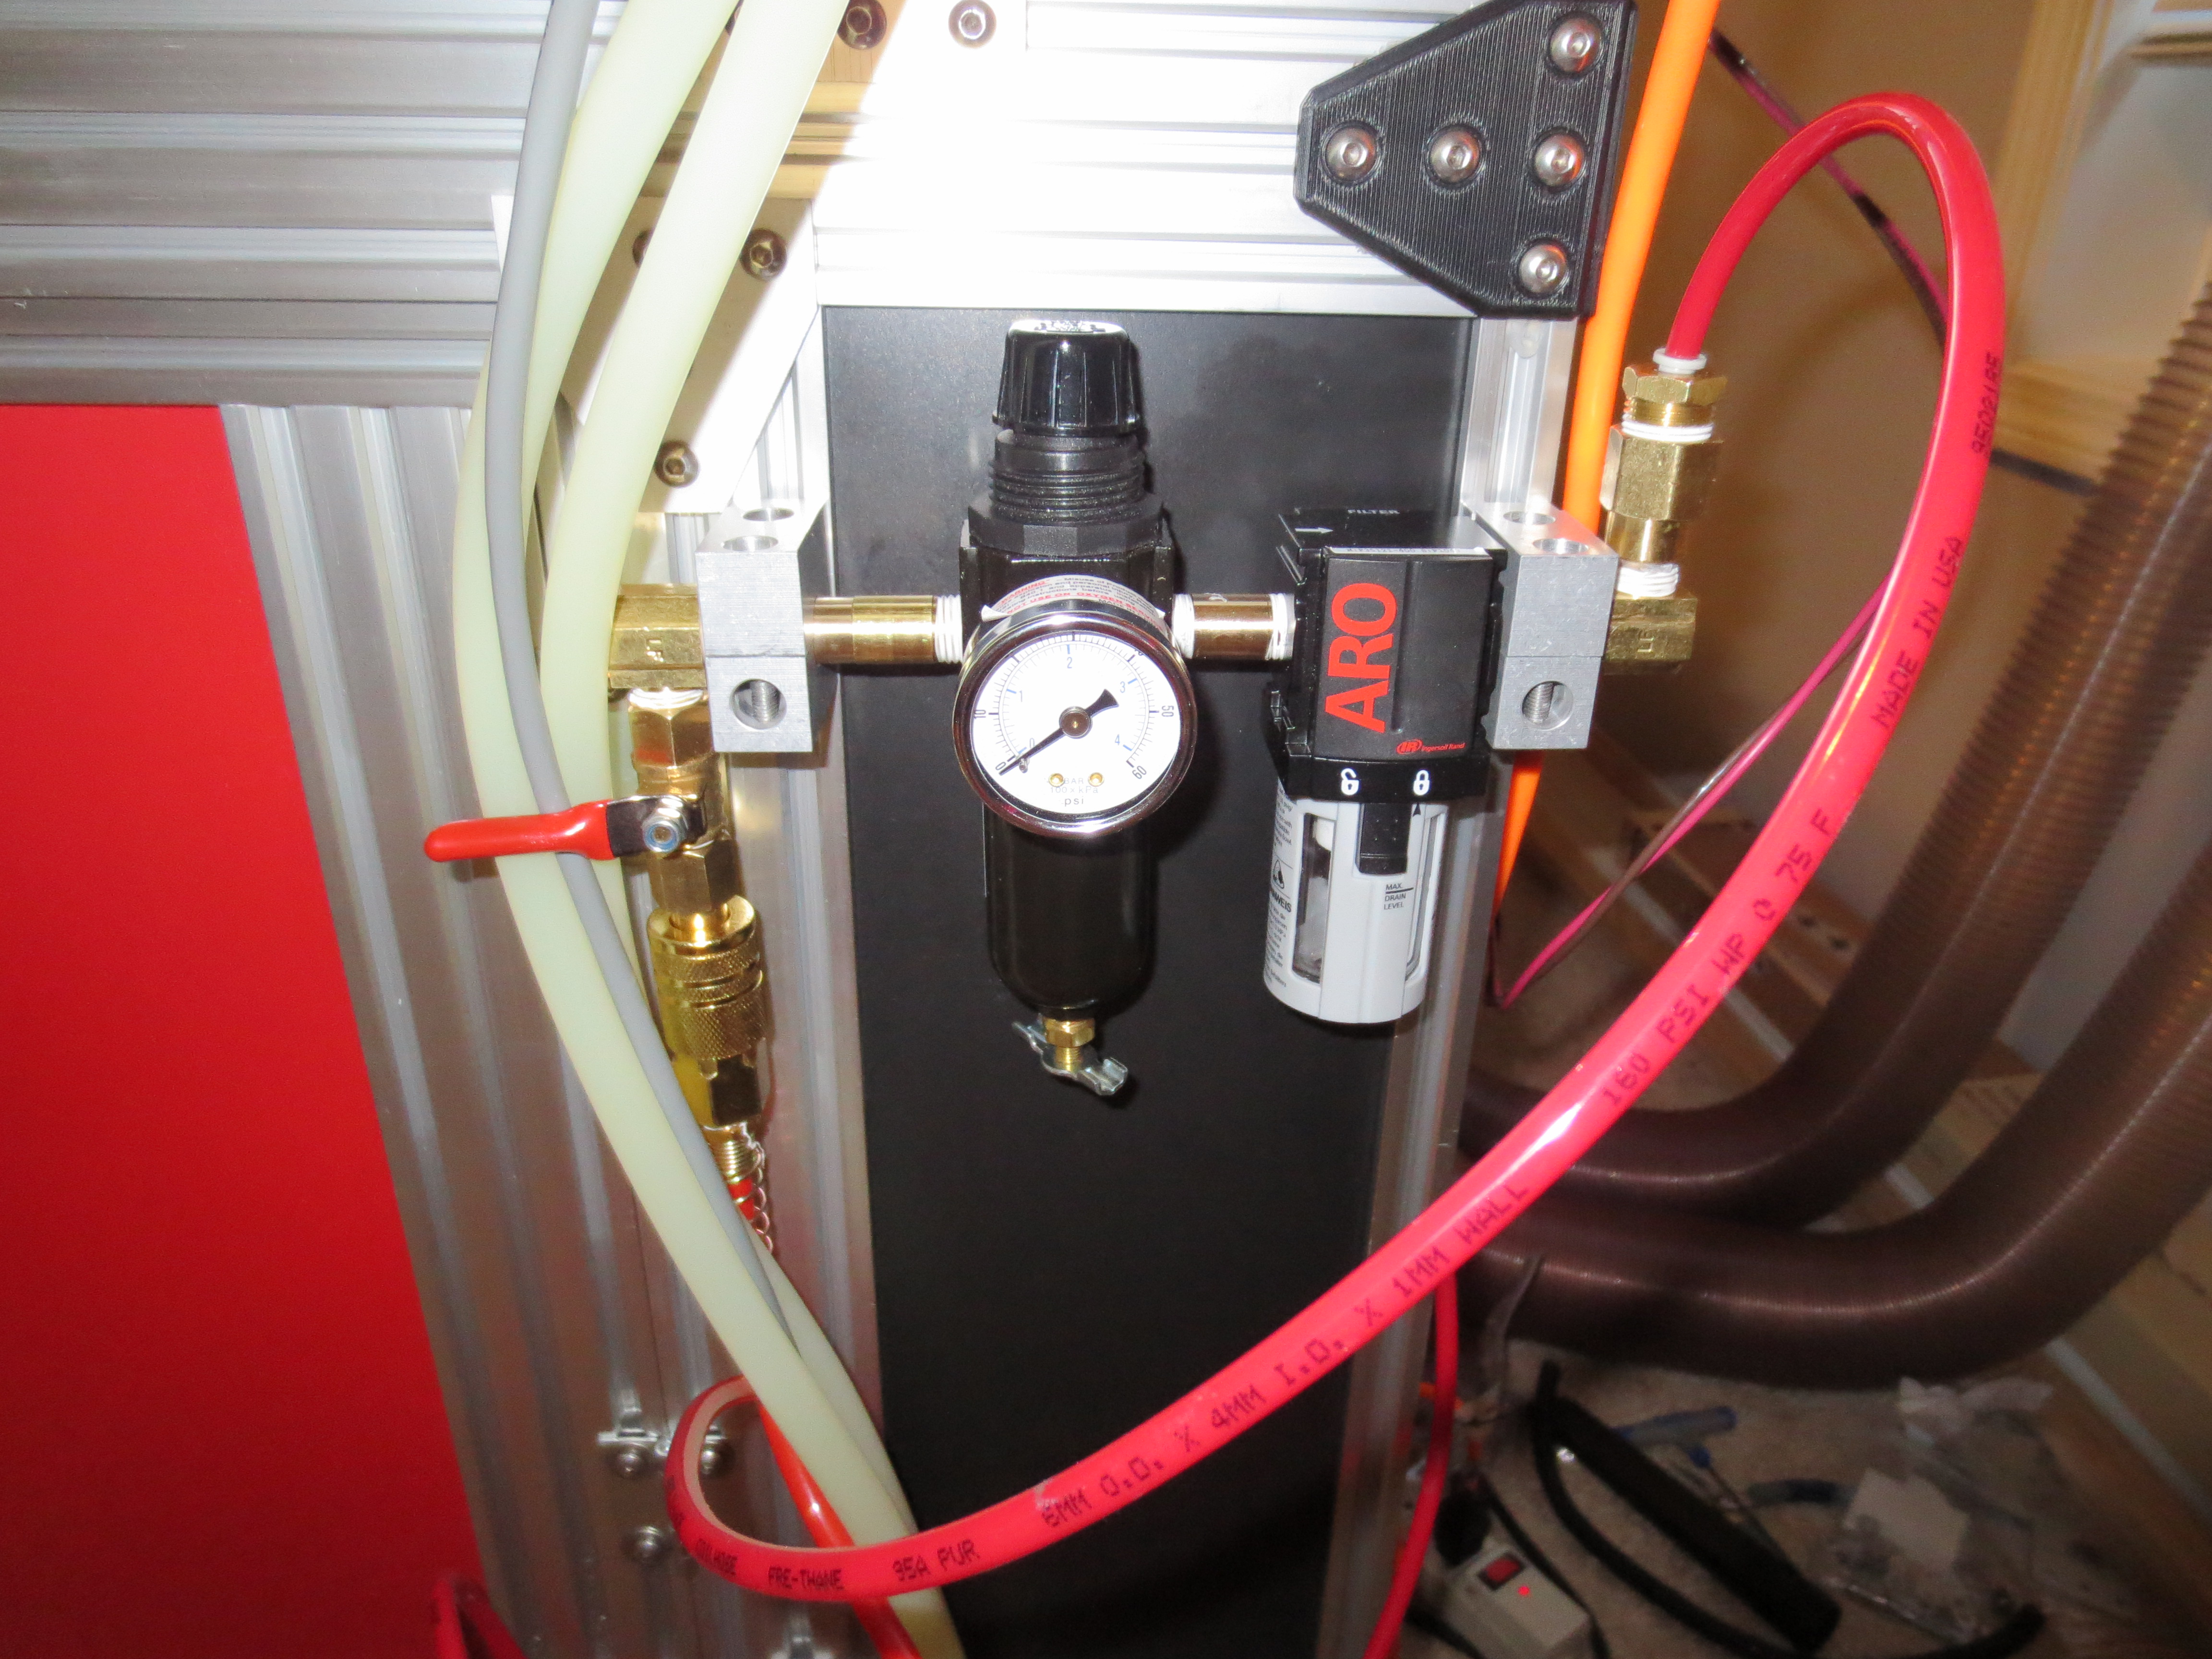
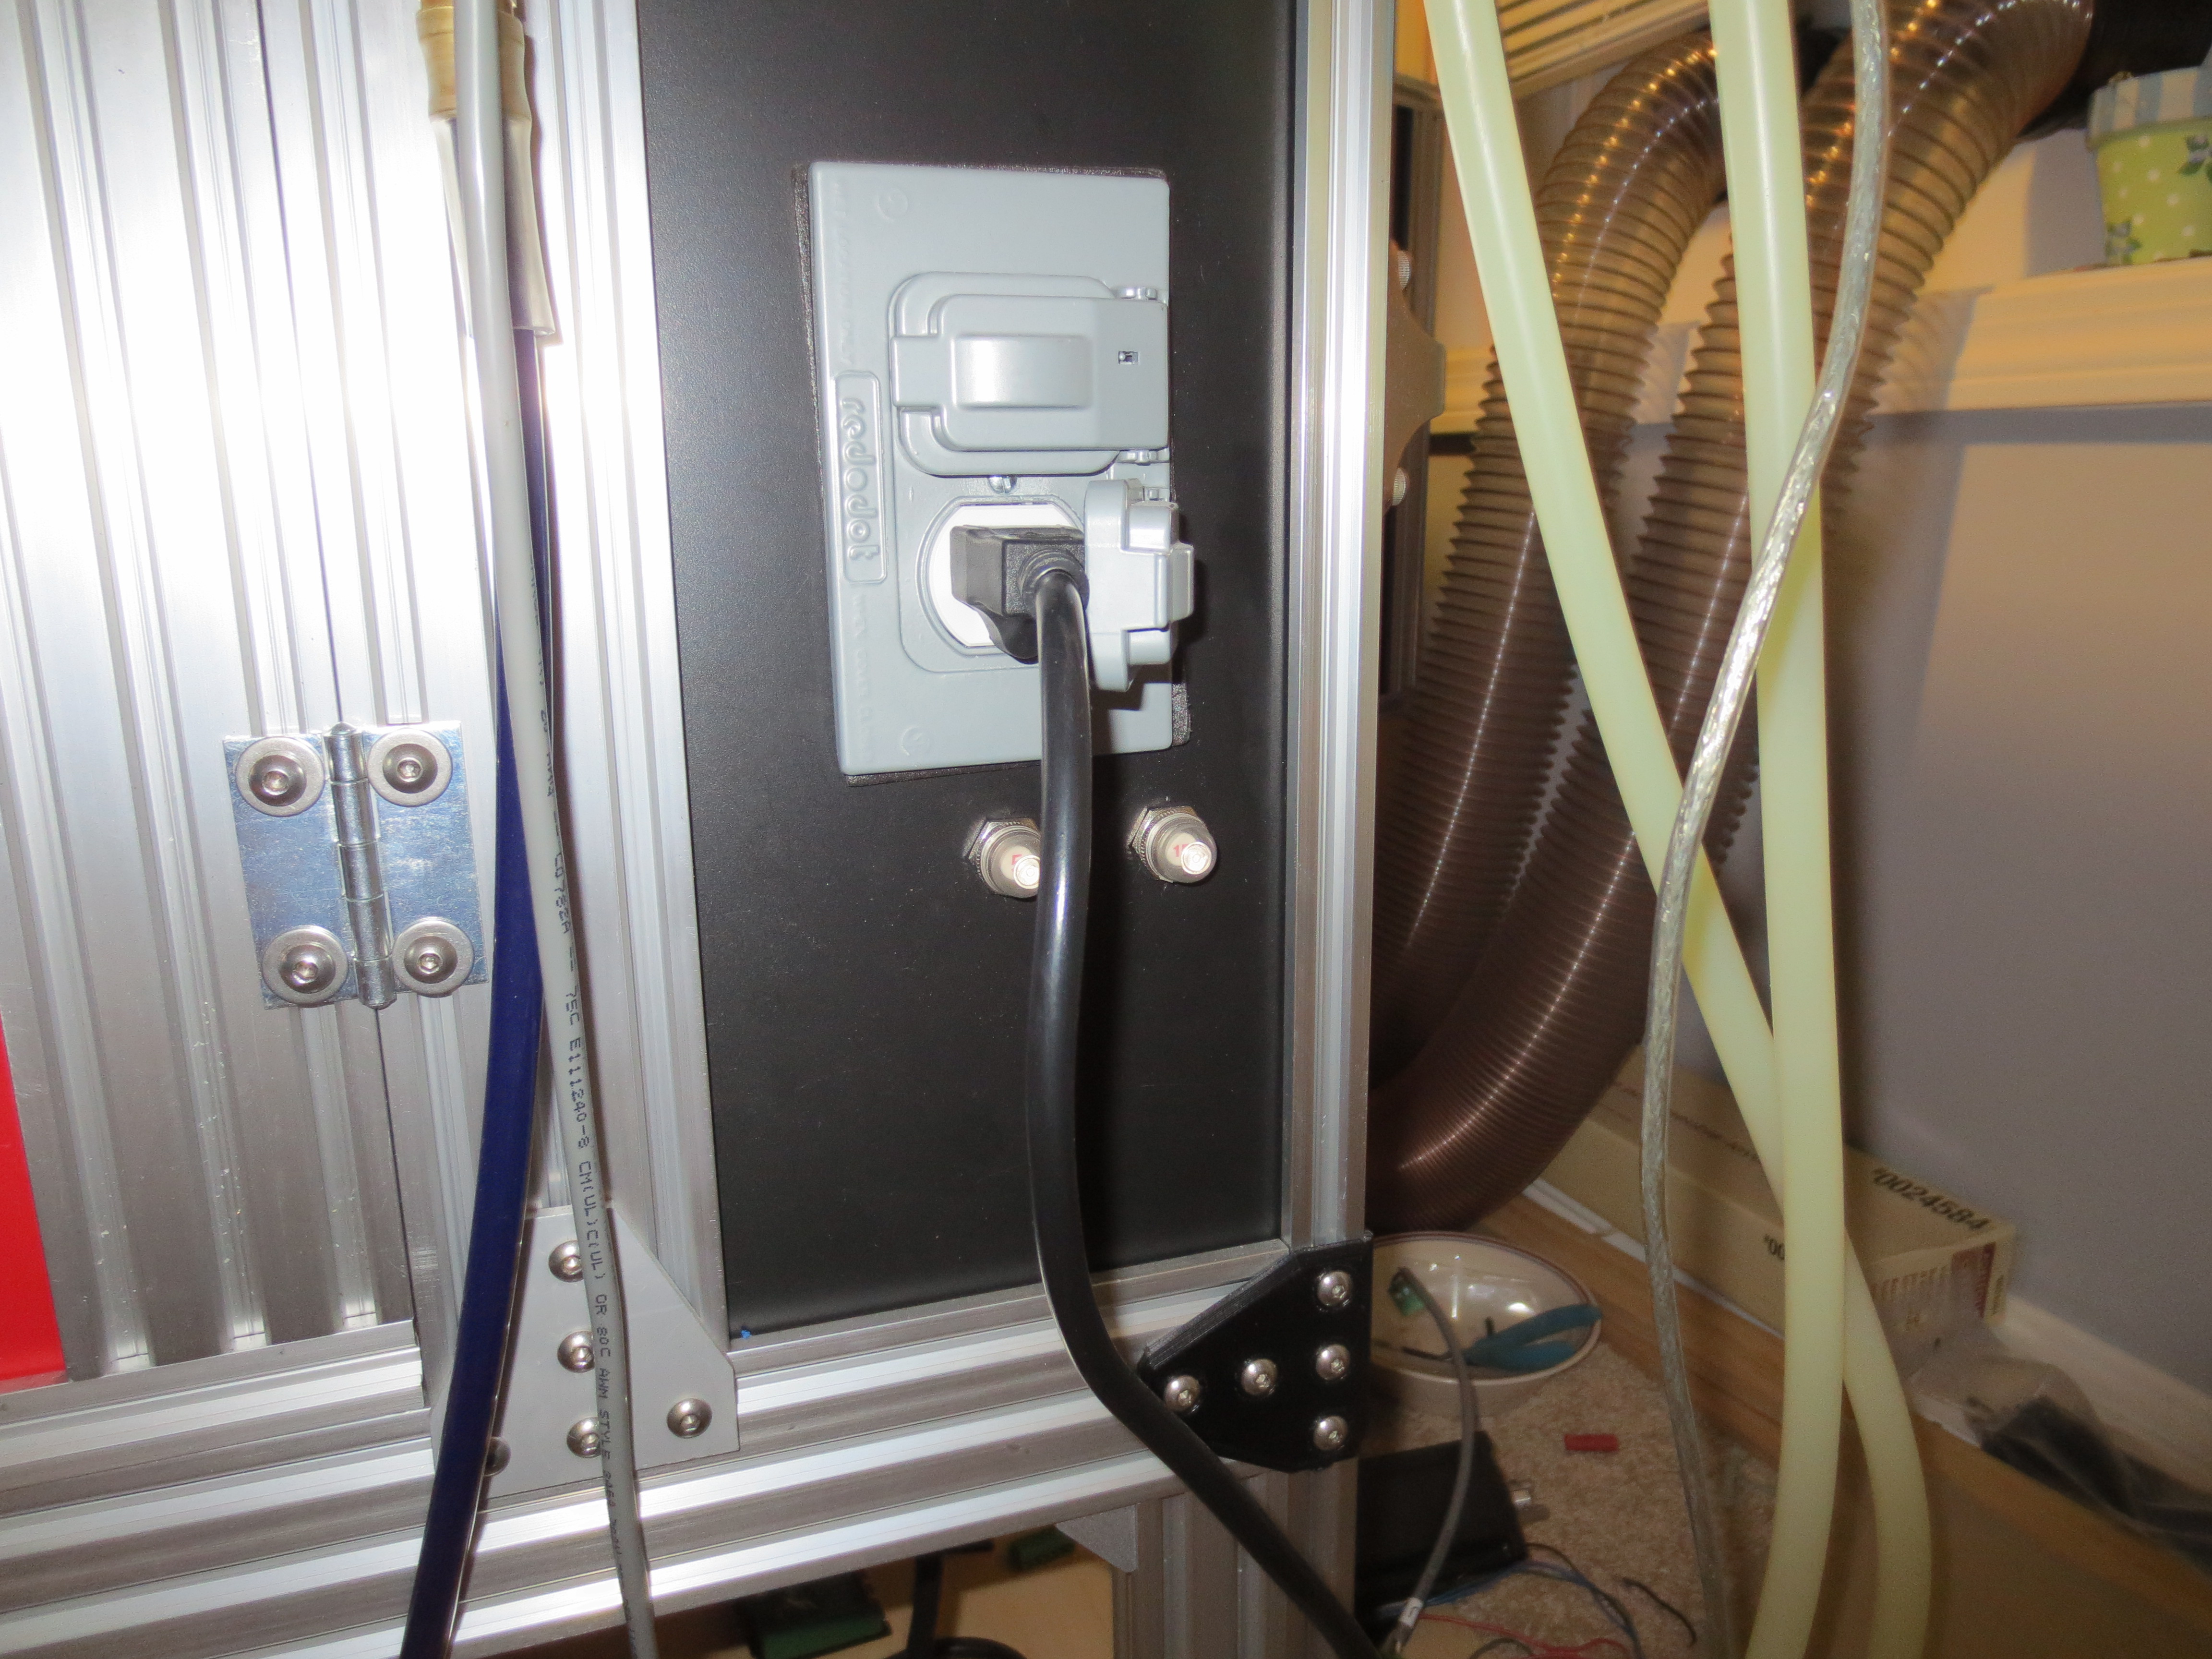
Laser Air
I chose the high volume but SILENT Eco Plus 7 Commercial Air Pump, 280W 200L/min from www.aquacave.com. An SSR-240D25R Solid State Relay provides switched power to an outlet on the side of the laser cutter so any commercial pump can be used (up to 5 amps; limited by the push button circuit breakers).